Defender of the Faith Aid Solo Climb

Defender of the Faith Aid Solo climb – Christmas 2021.

Defender of the Faith is a somewhat more accessible Aid climb on the Mt Buffalo Gorge North Wall. In spite of this it is every bit as committing as the walls most formidable lines. It spans 190m at grade 14M3 climbed with mechanical aid.

Access is via multiple rope stretching rappels down to Führer Ledge. Escape from here is via the very undesirable and seldom used traverse to the foot of Ozymandias (a very unpleasant ordeal involving several more abseils and wet, muddy scrub thrashing). Even from this point, one would face the prospect of a full days technical hike back out of the gorge, with scrambles and sections of fixed rope.

Defender of the Faith takes the face crack above the sickle-shaped rooflet left of the central gully (and starts in a chimney more-or-less below the gully).

Access/escape to Ozymandias takes the route down the vegetated, craggy outcrop in the bottom right. Although I found evidence of a by-gone direct rappel from Führer Ledge down to Crystal Brooke, I fail to see the utility of this except under duress – indeed there were left-behind tat and caribiners.

I had in fact aid climbed Defender of the Faith many years before; as part of a two-person team with my long term climbing partner. Defender was my first aid climb done in anger; undertaken over 11 concerted hours including ingress. I led only Pitch 2 on this occasion and I recall my first time using a cam hook. It was at eye level in a horizontal seam up in the back of the overhang. The hook was inches in front of my face and I could see it flexing, bending, and working it’s way out with every gut-wrenching bounce. I remember willing myself to stay calm as I gingerly shifted my weight reaching for a more tenable placement above the overhang.

This article tells the story of my Aid Solo attempt – my first big outing after a two-year period of quarantine lockdowns. What was planned to be a gentle re-introduction to adventure climbing turned into an epic suffer-fest of exhaustion, dehydration and a serious of significant errors. Apparently the pandemic had taken more physical toll than anticipated (not sure if I can attribute this to vaccination, infection, or two years of obligatory/coerced/self-imposed sessile lifestyle). Thankfully my tenacity (foolhardiness?) was still in check.

Having thus weighed and diligently considered your singular merits, we could not have devised a more suitable name, nor one more worthy of your Majesty than this most excellent title, which whenever you hear or read it, you shall remember your own virtues and highest merits.

Pope Leo X

Plan

The plan was to rap down to Führer Ledge for the first night (night zero), wake early and nail-up half-way (at least P1+P2; P3 bonus) then sleep below on Führer after Day 1. Day 2 (Christmas) would be an easy jug back up to explore the upper pitches before topping-out.

By my estimation and from previous experiences on the North Wall, I thought 2-3 pitches per day would be easily achievable. I provisioned my food and water for two days on this basis. If I recall correctly I packed 5x 1.25l coke bottles of water plus a camel back providing about 4l per day for the anticipated 2 days. Plenty surely… Given the hot weather and strenuous workload I demolished this provision in no time; and was rationing myself on both days. I think at least 6 litres per day would have been more sensible in the conditions; especially with dehydrated food.

Gear Load-Out for climbing Defender of the Faith Aid Solo

Day 0

Left Melbourne in the new Delica L400 at approximately 1930 on the 23rd December 2021. I was stoked to take it out for it’s intended purpose. I blasted Jimi Hendrix and the Enormocast (Mark Twight episode – f*cking epic!)

Arrived at Mt Buffalo around 2330.

I could not locate the little A-frame hut sheltering the climbers intention book. I looked all around thinking perhaps the long drive and late hour had affected my perception. It was gone. This disturbed me. I could not complete my deep-rooted ritual of scrawling down my intentions. As though like some occult incantation this would have a tangible impact on the outcome of my expedition. An omen of things to come?

I suppose Parks Victoria no longer care; but I hope a climber recovered the book for climbers posterity.

I pulled some pages out of my journal, to create a new climber book; bound with sticky tape and lodged my intentions with the tourist brochures by the Guide Alice plaque.

'Guide Alice' Plaque - Mt Buffalo
‘Guide Alice’ Plaque – Mt Buffalo

I set up the van to sleep by the oval – thermal screens convert it into a comfortable fortress. From this respite I considered how different things were for the early European visitors to the plateau. During the the restless night I woke to what sounded like a wounded animal.

Day 1 – Christmas Eve

Up at 0730. Two trips from Oval to the Defender rap:

1) with the Haul Bag.

2) with 3x ropes on my back and a camel-back on front.

When I returned with the ropes, a red-bellied black snake (I believe) was sprawled across the path, absorbing the the first rays of morning sun. Another omen? Rather than interrupting his morning activities I opted to gingerly creep around this section of the path.

View of the Victorian Alps - from Mt Buffalo -  atop Defender of the Faith Rappel
View of the Victorian Alps – from Mt Buffalo – atop Defender of the Faith Rappel

Defender Rappel Approach

I made a total of 3 rappels on the ‘Defender’ approach as described in Lord Gumtree Winter Climb Attempt. The first of 60m on a single line which I left fixed. Riding the pig with a lot of weight. A prusik was absolutely crucial on the brake hand.

Upon gaining the ledge, I set about breakfast with coffee being the first priority. While waiting for the water to boil I pondered the task ahead.

Brewing Coffee at the muddy Führer Ledge Bivouac; just below the start of Defender of the Faith
Brewing Coffee at the muddy Führer Ledge Bivouac

I set my first anchor deep in the P1 starting chimney – a number 5 camelot set for upwards pull; supplemented with an orange totem and green camelot.

First Solo Anchor - in the Defender of the Faith starting chimney
First Solo Anchor – in the Defender of the Faith starting chimney

Defender of the Faith – Pitch 1

45m at M3. M4 Crux?

RPs, Cam Hooks, crux very reachy + awkward; even top-stepping with 180cm height.

The crux of the route requires transitioning from an RP seam to another crack system 1-2 metres over. This involves a blind cam placement made at full reach; around an arete.

I will be a little vague but if you don’t want beta on the crux then skip the next two paragraphs.

The trick I found is to aid as high up the seam as possible; selecting smaller and smaller body-weight-only RPs (micronuts) until the seam peters out to nothing. Then with tip-toes high stepping in your etriers, you can clip the rope off high to serve as a tension pendulum while pushing-off against the miniscule body-weight placement, orientating your body into a maximally horizontal extension, above the arete. Only from this position does it become possible to just reach the fixed-hanger by finger-tips.

Reaching the next crack-system requires a similar maneuver; however the next piece to be placed is a tenuous cam. This must be placed blindly with finger tips. There is no way to visualise the crack so the cam must be placed entirely by feel. The issue with this predicament is a pendulum fall at full reach while laying sideways against the wall. I attest to this as my first cam choice blew out as soon as I weighted it.

Top stepping (getting as high as you can on the piece you’re on) is one of the harder and scarier aiding techniques – and in the case of bleak aid – also one of the most hazardous!

Andy Kirkpatrick

I think this would be a completely different story for somebody with even slightly more or less height than me.

I vaguely remember a traversing bathook on my first ascent of Defender of the Faith (and a missing bolt?). My partner mitigated the reach by hooking a carrot-bolt using the wire of a nut (and he is at least 6″1′ compared to my 5″11′); however I did not require the technique on this ascent. The guidebook mentions two bolts here. I found only one (but did not find any hole). I suspect things have changed at the crux over the years.

After struggling up P1 I was very low in energy. Although simple climbing (mostly cam-jugging) the upper run on the wider crack-system found me resting a moment after each effort scaling the aiders. I recall during my first experience on Defender of the Faith my partner explaining to ‘try not to rest or look around after each sequence’.

I had a cup of tea before cleaning the pitch.

Defender of the Faith P1 Fixed - where the yellow cuts horizontally up high  are the crux moves leftward into the beginning of the crack-system
P1 Fixed – where the yellow cuts horizontally up high are the crux moves leftward into the beginning of the crack-system

Cleaned.

Dropped the microtrax – crucial for hauling (although I retain a second device threaded onto the ‘far-end’ which I find indispensable for hauling while solo). Dropped a handful of bolt hangers.

Exploring the Führer Ledge Environs

Found microtrax on the ledge; and some of the hangers resting atop the bracken. Thoroughly exhausted I decided to blow-off climbing and went on mission looking for booty (I remember we lost a blue hex to Führer Ledge on my first outing here – I figure there could be a lot of items hidden amongst the thick bracken although finding it might require a metal detector!).

I found and removed an abundance of old tat and a conspicuous rubber mat, rigged over a small cave between large boulders (to facilitate hauling? Rescue abseil with a litter? – the rusty old chain was pointed directly to Crystal Brooke through the scrub). The rubber mat was extremely heavy but I managed to drag it back to my Bivvy along with the rest of the trash.

While out hunting for more debris, I accidental discovered a geocache (my first – and perhaps the most unlikely and inaccessible in the state!). I made an entry and donated some some souvenir biners that I had found on random tat.

North Wall Geocache
North Wall Geocache

Set up Bivy. Slept on the found rubber mat and bracken – this helped smooth out the stones and roots.

Führer Ledge Bivvy at the foot of Defender of the Faith - Wet, Lumpy and Brackeny.  The piece of rubber I removed from the area helped to smooth out the rocks and tree roots beneath my $5 yoga mat (standard big wall sleeping technology) - the half-empty pig served as a make-shift pillow.
Führer Ledge Bivvy at the foot of Defender of the Faith – Wet, Lumpy and Brackeny. The piece of rubber I removed from the area helped to smooth out the rocks and tree roots beneath my $5 yoga mat (standard big wall sleeping technology) – the half-empty pig served as a make-shift pillow.

There was a taught single rope visible above Big Grassy but I couldn’t see any climbers. I assume they were on Ozymandias? Later after dusk I could hear voices yelling in the distance. Glad I wasn’t having an epic.

One pitch in Day 1. I was exhausted and far slower than expected or required. Not a good start.

Wrote Journal. Drew Topo. Ate Dinner (rehydrated). Turned-in for Sleep.

Defender of the faith - P1 Topo and notes.  Information redacted to preserve some of the challenge and mystery.
Defender of the faith – P1 Topo and notes. Information redacted to preserve some of the challenge and mystery.

Day 2 – Christmas 2021

0715 – 1330; 0330 – 0630 (Lunch P2/3 belay).

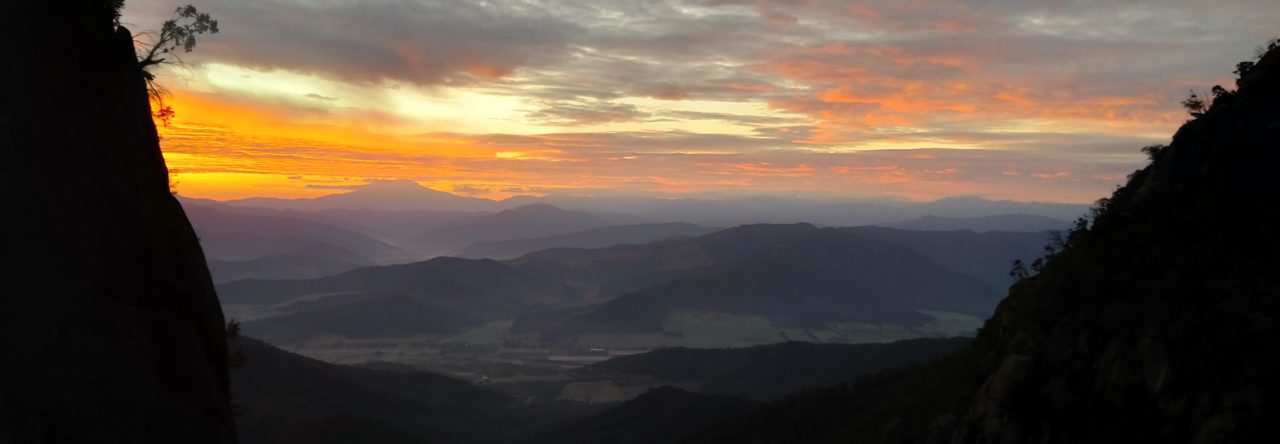
I woke at dawn to an incredible sunrise. It was a restless night. I had dead arms and a strong thirst. My food had been nibbled through the bag. It would seem the cold dark domain of the possum is not confined to the Bivvy by Crystal Brooke.

Sunrise from The Mt Buffalo Gorge - never fails to amaze.
Sunrise from The Mt Buffalo Gorge – never fails to amaze.

Defender of the Faith – Pitch 2

40m M2 to 3bb. Cam-Jugging and Cam-Hooking with hand-sized cams and big nuts for pro.

Pitch 2 is where the main crack system really takes off through the little rooflet and continues gloriously 100m all the way up the face through pitch 3!

P1 was already cleaned so I prepared to jug up and haul. I loaded up the bag. After coffee + ablutions I sorted gear and stowed the tat + garbage collected from the night before.

I jugged, hauled and made my way back up to the anchor. It was complicated setting up an upward pull anchor at the start of P2 while retaining downward protection. The available fixed gear consisted of a rusty piton with a cracked eye; and a rusty and bent down carrot bolt; hanging with no stance. I managed to move one cam and share the other with the rusty carrot.

At the Anchor ready to climb: The best rope bags money can buy ($0.99 grocery bags) and yes a gnarly dehydrated piss jug.  See also: Ode to the Piss Bottle for the state of the art.
At the Anchor ready to climb: The best rope bags money can buy ($0.99 grocery bags) and yes a gnarly dehydrated piss jug. See also: Ode to the Piss Bottle for the state of the art.
Double cam hooks at Defender of the Faith - one for each foot.  Bomber if you don't jerk around too much.
Double cam hooks – one for each foot. Bomber if you don’t jerk around too much.

I climbed on slow and thirsty through Pitch 2; moving through the small roof with less reliance on cam hooks than in my prior attempt (rather larger gear in the continuing crack). I only had two coke-bottles of water left for the whole day, so I had 1.25l + 1.25l for P2, P3 and the as yet unknown P4+5 climb out.

P2 Anchor: Rusty Piton and finger cams (Fixed; just prior to cleaning)

Defender of the Faith – Pitch 3

50m M2 to ledge and chains. ~60m of rope on solo? More cam-jugging antics up the relentless face crack!

A rope-stretching pitch with bountiful cam-jugging. There were no photos taken from this point on-wards due to the circumstances I will describe.

Error 1 – Critical

Dehydration.

At the beginning of the pitch, 45m off the deck, I realised I had made a crucial error in my self-belay system. I was not effectively belayed at a moment when I absolutely should have been. You can imagine the risk factors involved here and the sickening consequences.

The seriousness of this is not lost on me – I won’t exaggerate the situation, nor pretend like it did not happen. I fucked up tremendously and the thought of this still plays on my mind.

This is the second instance that I’ve made a very serious error under circumstances of exhaustion and dehydration. Thankfully both times I have determined the error before the risk was realised.

It is apparent when solo you need to take time to systematically check yourself at every system transition – as though you were checking another person. It is also apparent the need to preserve attention and focus through adequate hydration.

Continuing Up

Pitch three is relatively simple cam-jugging; however it is long – very long. Indeed it takes a full rope length when rope-soloed. I continued with frequent rests and finally ran out of water after rationing through the second pitch.

Again I remembered Dan’s insistence years ago, not to pause, not to look around at the view, just continue move after move, gaining height with each step. Over a 9 hour climb, every minute adds up. Ten minutes wasted every half an hour means + 3 hours and maybe the difference between topping-out and an epic…

Climb one piece. Stop and rest.

Climb one piece. Stop and rest…

Dehydrated and fatigue were really setting in. Even in the morning I had only made a 1-shot coffee to conserve water – running coffee through the filter twice. I know caffeine is a diuretic but I also needed the energy and the motivation afforded by this essential creature-comfort.

All I could think of was water and the roar of Crystal Brooke was taunting me relentlessly.

I decided it was too risky (certainly after events at the anchor) to push through dehydrated so rather than climbing-out I planned to climb on to my P4+5 fixed rope and jug out, leaving gear and haul bag in situ. I’d go straight to the nearest water source and clean after myself later.

This is actually a common way of completing the climb when using aid; as the upper pitches are indistinct and typically wet and slimy aka “make for an excellent mountaineering challenge”.

“an excellent mountaineering challenge”: a meandering or indistinct route, frequently wet, slimy and/or chossy.

Error 2 – Significant

I ran out of lead line (~60m) about 10m below P3/4 anchor at the big ledge. Luckily my fixed line was hanging down just enough that I could traverse right and reach the fixed line, then join the ropes to facilitate jugging later.

Using an Alpine Butterfly on each end and weighting the upper rope I was able to join the two with a carabiner.

Jugging up the fixed line was simple work but when I got off the rope it rested into slight tension – gradually becoming tighter as the ropes relaxed further.

I fitted a prusik off the P3/4 anchor onto the P3 lead-line to hold the load on P3; avoiding the full 120m of rope stretch when later jugging back up (dynamic ropes typically have a 5-10% stretch in them; which reduces efficiency when climbing fixed-ropes)

This left tension on the upside fixed rope. I didn’t think much of it in the moment but this became a significant challenge. Rather than a traditional rope ascent it became a 60 degree up-hill Tyrolean Traverse all the way to the fucking summit block. This is about as difficult as the situation could possibly become – much worse than either a semi-vertical rope-jug up the escarpment OR a semi-horizontal Tyrol.

Tyrolean Traverse: To haul oneself (while clipped in) horizontally along a line fixed between two points.

After immensely struggling to jug the taught, 60-degree rope for what seemed like hours, I stammered off the block to the tourist track and bee-lined to Crystal Brooke bridge. I thought I would drink and a swim; however due to the steep banks Crystal Brooke was inaccessible from above unlike the exposed rock-bars and pools down in the gorge.

I walked up-stream to find only a stagnant pumping dam. continuing up the road to the Delica I finally doffed my gear (unneeded pro + camel back). I drove back up to the look-out car park where water was freely available on tap.

Error 3 – Annoying

My remaining food was still in the haul bag, 100m up Defender of the Faith (or 100m down depending on how you look at it…). So for dinner I ate only a packet of chips + an apricot juice cup I found in the van… of course accompanied with copious amounts of water.

Haul Bag (with my food) half-way up (down?) Defender of the Faith (yellow highlight at the P2 Belay)

Error 4 – Problematic

It didn’t occur to me until I’d sat and imbibed about 2l of water and a packet of chips that it would be near impossible to get a rappel device onto this taught fixed-line, let alone descend it with so much friction.

I planned in my head about 2-1 de-tensioning the line with prusik and pulley in order to fit a gri gri and failing that to simply reverse jug down (very tedious option). Of course in retrospect even fitting a gri gri over a de-tensioned bite would be useless as soon as I released tension through the 2-1, as the friction would render the gri gri immovable.

The party on Ozymandias were completing their final pitches in the waning sunlight – the chimney to Gledhill Memorial ledge and summit block. I contemplated walking to the look-out to greet them at the summit but honestly I had no energy left to spare. We never saw each other after. Sleep was fleeting (dreams) and I was up again at dawn.

In retrospect, Pitch 3 had a cascade of problems exacerbated by dehydration any of which could have become much worse. All of which cost significant amounts of time, energy (and water).

Day 3 (Day 2.5?)

Cleaning-Up

0730 – 1330

More water + muesli bars + apricot cup for breakfast. Drove back down to the Oval to tackle the descent to P3 and retrieve the gear and haul bag.

Set up pulley on manky chain + prusik to pull-up slack in rope and get a gri gri on. Rappel was difficult to start pressed into the rock with too much friction.

As I gained more rope, I gained more stretch above lengthening the rope and reducing friction so the abseil became quite tolerably after 10 or so metres. Continued down to ledge, then to P2/3 belay. Released the pig.

Jugged up and cleaned (off the joined rope to prusik/anchor) Far end hauled the bag over the small roof, before continuing on.

Error 5 – Demoralizing

From big ledge I was sure the bag wouldn’t get stuck so I didn’t bother far-end hauling but instead just positioned it favorably and jugged back up to the tree below the summit block (the rope now free, this was much easier). Began to haul and the bag literally got stuck immediately. I let it drop + repeated haul a bunch of times to no avail. Set up a 3-1 pulley. No dice. Had to rap back down and far-end haul half-way up (past shrubs) then continue to jug back up to the ledge.

Resting on the Big Ledge - view to South side of the Gorge.
Resting on the Big Ledge – view to South side of the Gorge.

Escape to Reality

Two-trips to get gear back up to the track. Encountered some tourists and experienced deja vu. I don’t think it occurred to him that the immense mass of gear on my back was not in fact in preparation for the Tourist Circuit day-walk. They clearly had no concept of the kind of ordeal I had just been through.

Now here’s a guy who’s prepared for anything.

Russian Tourist with His Mum and Hot Wife

They tried to make conversation but exhausted near to the point of collapse and smelling like human shit due to the waste container strapped to my haul bag I excused myself and continued. Disheveled and rancid-smelling, I passed through a family picnicking and playing frisbee on the oval.

After setting down my gear, I began disposing of all the tat I had hauled up the cliff. One of the picnickers asked if I dispose of my rope after every climb and I explained that I had cleaned this all up from the environment.

The expeditions clean-up efforts

Exhausted I was unable to pack the heavy rubber mat on top of all my other gear. After hauling it up onto the summit block, I rolled it up and stashed it below the anchors – perhaps it will serve as a useful rope protector or somebody else will have the energy to pack it out and dispose of it.

I returned to Bairnsdale via Mt Hotham in the Deli for family Christmas dinner!

Later that night

I received a government text message stating I had been potentially exposed to COVID-19 some days prior to my expedition.

I enjoyed Christmas dinner.

The next day my family managed to obtain some of the last RAT tests in the rural city and I tested negative. I guess I can’t blame (recent) corona-virus infection for my exhaustion, poor performance and absence of mind during the prior days.

Lord Gumtree: Aid Solo Climb Winter Attempt

Onwards and upwards. Lord Gumtree Climb – 2019 Retropost.

Lord Gumtree is a lesser known climb taking in some of the same sections of the Mt Buffalo Gorge North Wall as Ozymandias. In fact, Lord Gumtree shares the same first pitch as Ozymandias and last two pitches as the direct. Where they diverge – a path far less traveled – offers harder and objectively riskier aid climbing. This post tells the story of my attempted Lord Gumtree Aid Solo climb at the end of winter and the circumstances around my retreat.

Mt Buffalo - North Wall of The Gorge - showing Lord Gumtree, Ozymandias and other epic climbs.
Mt Buffalo – North Wall of The Gorge. Lord Gumtree trends right of the yellow streaks.

After completing my aid solo ascent of Ozymandias Direct, I decided I would try some harder aid climbing and explore the other facets of the Mt Buffalo Gorge North Wall. This also presented a nice opportunity to take the Defender Rap approach and make a direct comparison with the South Side approach (tip: they are both heinous).

Although technically I started out in the first week of spring, I think it would be fair to claim “astronomical winter” – particularly with ample snow cover on the plateau and recent snow-fall. There were mounds of snow on Führer ledge and even a small pocket still clinging to big grassy!

Rope in Snow above the Defender Rap
Three’s a charm, – or neurotic…

Unfortunately this was an attempt only. After the fourth pitch I retreated to Big Grassy and would later continue via Ozymandias Direct.

Three months earlier I could not have imagined “bailing” UP Ozy …

The scared climber often points his fear at the ground, believing that retreat will deliver a more comfortable state of mind… learn to aim fear at the belay above.

Mark Twight (Extreme Alpinism)

The Plan

Lord Gumtree Aid Climb Topo
More scrawls and marginalia… Copyright-blocking hooks.
Guidebook from Open Spaces Publishing.
Big Wall Provisions
Standard Big Wall Fare

Day 0 – Defender Rap Approach

I left home at 0830 and hit the great alpine road. There were some recent snow dumps and low temperatures, so as I got above Dinner Plain, the road conditions became quite sub-optimal. Much worse in fact than any of my previous trips. At one point before reaching the resort, I was forced to make a complete stop by a vehicle in front. Regaining traction was an amusing prospect.

As I reached the alpine resort – chains were mandatory and it was obvious why. The road was encrusted in ice and snow. On the west side of the resort, the spin-drift was so intense that it was an effective white-out. I struggled to differentiate the snow bank, the road, or the car in front of me. So I crawled along barely above idle for a kilometer or so.

Victorian Alps from above Mt Buffalo Gorge
Hang Glider Ramp with Alps in the distance (The Razorback to the right).

I arrived at Mt Buffalo to find the visitor car-park closed for snow clearing. After braving the cold to sign the intentions book, I drove back down to the oval to park nearer Wilkinson’s lookout and the Defender Rap. As soon as I pulled off onto the snow covered shoulder, the wheels were spinning and the car sliding around. I had to install tyre chains to be able to park in a civilised manner though I was more concerned with departing some days later in case of more snow fall.

I loaded up the pig and struggling to balance began to traverse the snow-covered oval towards the Gorge tourist trail. Despite being much easier terrain than the South Side approach, there was plenty of ice and snow and I still managed to sprain my ankle. (Previously damaged 5km into the 10km Grampians Wonderland Loop hike…) What’s a big wall approach without some form of injury…

Snowy Mt Buffalo Tourist Trail - on the way to climb Lord Gumtree
Mt Buffalo Gorge Tourist Trail – First week of spring.

Locating the Rap

Along the tourist trail, 30m before the Young Galaxians boulder, deviate South East for about 30m to find rap chains amongst some boulders atop the escarpment.

Defender of the Faith Rappel Approach

Three double-rope rappels gains Führer Ledge. Be vigilant – don’t over-shoot the belays, use a back-up hitch and for gods-sake knot the end of your rappel ropes!

Riding the Pig - on the approach to climb Lord Gumtree
Riding the Pig

Riding the Pig: A technique used when rappelling with haul-bags (Pigs). The rappel device is extended away from the body and the Pig is hung from the device (not the harness). The Pig is straddled and rode to glory.

Defender Rap

  • 1: 60m, to double bolt belay. Be sure to pull the knot over the edge on first rappel.
  • 2: 47m, to double bolt belay 5m right.
  • 3: 52m, to Führer Ledge.
Defender of the Faith Rappel Topo

The wall was icy and dripping wet. My ropes were dislodging little pellets of ice from the shrubs and rapidly became saturated with muddy run-off. As the rope ran through my ATC device, seemingly litres of ice cold, muddy water were squeezing out of the rope and running down the tails of rope onto my brake hand and down my leg.

On the final rappel pitch, the bottom 8m of both my ropes landed in what was essentially an ice water pond at the base of the wall. Straddling the pig, I managed to scuttle across and complete the rappel to the left of a spirited waterfall.

Führer Ledge Slush Fest

I had reached Führer Ledge.

The prevailing emotion would be one of nostalgia...
The prevailing emotion would be one of nostalgia for those left behind; combined with a spirit of bold curiosity for the adventure ahead!

(An overly optimistic evaluation of my state of affairs)

Difficult gully thrashing and two more rappels gains the area directly below Ozy and the ‘Turret Bivy’. Cosy for one – cramped for two.

Turret Bivvy - beneath the start of Lord Gumtree
Turret Bivy – more secure than it looks

Traverse to Ozy

The front edge of the icy pond where it flowed down, away from the wall and over the Führer ledge, had formed a kind of “snow bridge”. I tried to use this to get across the pond but the weight of my gear caused me to punch right through. Before even finishing the approach my ropes, shoes, socks and pants were already saturated.

There still remained some bush-bashing and a couple of low-angle traversing rappels through scrubby runnels and what is apparently a gushing torrent of water in the winter. This meant alternately packing, pushing, hauling, dragging and riding the pig while negotiating scrub, trees, snow and running water without falling in!

1: Right up and over the rise then scramble down to a drop. 46m rappel off tree.

2: Long, indeterminate double rope abseil down wet, loose, brackeny, creek-bed gully gets you to the base of Ozy. Find the tree with tat. When you see the smooth rock opposite to the main wall – you want to be on that side. Don’t slip or you’ll swing off into the winter stream (with all the added inertia of the pig!). I did. I also missed the tree with tat so still had my rappel rigged higher up further towards the wall and couldn’t get back out.

Debris in the Water Runnel Environs

Apart from getting beat and wet I did find a nice offset HB nut amongst the rocks. This factored nicely into my micro-nut water fountain anchor.

I was gold-panning with a friend recently in East-Gippsland. This reminded me of his explanation how the dense metals (aka heavies) fall out of suspension in areas where the water current slows. The winter-stream that forms down the foot of the North Wall is essentially collecting all the booty and depositing it amongst the stones!

Booty – n. gear left behind for the taking, usually either from a previous party bailing on a route or accidentally fixing gear

In previous trips into the gorge, I had noticed occasional styrofoam beads scattered around the otherwise pristine Crystal Brooke Bivvy site. Now I came across the source of this insidious pollution: a plastic bag full of bean-bag filler lodged between rocks in the approach gully run-off. This really broke my heart.

The degraded bag had been gradually releasing thousands of styrofoam beads into the Mounts Eastern watershed. I carefully removed the bag for proper disposal and collected as many spilled beads as I possibly could. Later I would even seen beads lodged high on the escarpment – carried up by the wind.

Polystyrene is a truly hideous product causing immense damage to so many animals and natural environments. It fragments into millions of tiny non-biodegradable pieces, scattering through sand, soil, and water posing an extreme difficulty to collect or remove.

I also manage to cut and remove a large amount of old abseil tat from trees left behind from decades old excursions into the gorge. I established a rubbish container to haul up below my pack on the multi-day climb.

Tat - on the approach to climb Lord Gumtree
Tat

Tat: Weather-beaten and ragged slings, left behind on belays, bolts, chockstones and threads. Often to be treated with extreme caution. On longer routes that you may have to abseil off, take up some tat with you that you can use for an anchor and leave behind, rather than leaving more expensive nuts etc.

Setting in for the night

Before dinner I set about housekeeping.

I stepped across to the foot of Ozy to install my anchor in preparation for the next mornings start. The trusty weeping crack I have relied upon in the past was now a verified water fountain! No ball-nuts this time, I’ll admit the ball-nut was a joke piece.

Seeping walls beneath Ozymandias and the start of Lord Gumtree
Seeping walls beneath Ozymandias – water-fountain micro-nut anchor

Crystal Brook was churning a maelstrom, with white frothing waterfall. No crossing would have been possible for a south side approach – save by pulling through rapidly flowing ice-cold water. All the stepping stones were submerged. I filled up several soft drink bottles with water, as is procedure.

Crystal Brook
Crystal Brook: Extra (I think that’s what the kids say)

After an enthusiastic and intrepid start, I settled into the evening but I knew my mind was not in the right place.

Normally the Solitude and Commitment (the state of being committed by external factors – not necessarily the internal state of dedication) would give me clarity, focus and calm.

Normally this would be a welcome respite from the thoughts and feelings of everyday life.

Today I couldn’t quiet my mind or put away certain feelings which I would carry up the wall with me. I think this was a factor in why my attempt at Lord Gumtree would be only that.

Day 1 – Lord Gumtree Attempt

Eighty-five miles distant is the faint outline of Mount Kosciusko (altitude 7328 feet)—the highest peak in Australia. In the middle distance stands Mount Bogong (6509 feet), and to the right Mounts Fainter (6160 feet) Feathertop (6306 feet), and Hotham (6100 feet).

Fine Panorama of Mountains
Sunrise from the Turret Bivvy - At the foot of Lord Gumtree
Sunrise from the Turret Bivvy – At the foot of Lord Gumtree / Ozymandias
Victorian Alpine Region - Annotated; view from beneath Lord Gumtree
Victorian Alpine Region – Mt Feathertop snowcap (please comment if I messed up the annotations)

Pitch 1:

As for Ozy Direct. Tricky aid off-the-deck.

Pitch 2:

27m M3. Traverse R at horizontal to join Lord Gumtree. Good wires, cams, hooks.

The crack was obvious if somewhat vegetated. This climb obviously receives far less traffic (if any) than Ozymandias, and the crack was mostly filled with dirt/mud/grass/moss and general water and slime. I was spending most of my time digging for placements with my nut tool and nothing was apparent without a bit of excavation.

Pitch 3:

27m M3. HBB higher than shown in Lindorff/Murray Topo. (Level with Ozy P2 HBB . More digging for placements. By this time my chest and sleeves were becoming soaked in cold mud.

Pitch 4:

30m M6 to HBB on Dirty Sloping Ledge (If you thought Big Grassy was bad…). Difficult, dirty, grovel up left to big grassy – not recommended but I’ve yet to investigate other Bivy options.

Yet more gardening only the placements become less frequent and more marginal (mini-offests, RPs).

This was very psychologically taxing with no visible placements (good or otherwise). Standing-idle against wet rock and rope, scraping mud out of, ice-cold rock only to find marginal placements at best, delivers cold-comfort.

I soon learned the number 3 Pecker I had recently acquired made short work of the blade-thin seams and blown-out pin scars.

Pecker – A thin piton resembling a bird’s… beak.

Placed passively as a hook (NOT hammered), a Pecker (AKA: Beak) can offer non- destructive and secure protection where nothing else will. The sharp point inserts itself and drives down into the thinnest, deepest constrictions. These are pieces of last resort for difficult trad or clean aid climbing alike.

It was recommended to me to carry a talisman-beak for these more technical aid endeavors and it payed dividends. More than simply a Talisman it proved a valuable tool through pitch 3 and 4. I assume a beak or two will be crucial for the blown-out pin-scar micro-nut placements on the crux but I will have to find that out another time…

Dirty Sloping Ledge

Unlike Big Grassy; Dirty Sloping Ledge is tantamount to its name.

In the cover of darkness I made it to the “dirty sloping ledge”. Sleeping there does not bear thinking about but it is only about 8 metres up to big grassy from the left. It is 8m of dirty strenuous grovelling but the relative luxury of Big Grassy was incentive enough.

At some point in the lower pitches I had bumped into a fellow soloist who was “fixing up” to BG but Bivying on the ground for the night. We had exchanged only a few words but his presence provided some much needed motivation to get my task done. I knew he intended to continue up Ozymandias Original the next day which gave me the space to take Ozy Direct as a Plan B.

I set up my hammock and anchors under his fixed ropes and made sure to keep everything neat and free knowing he would be jugging up in the early hours while I too would be setting off.

Day 2 – Retreat to Ozymandias Direct

Sunrise on Big Grassy - Ozymandias.  A slight deviation from the route of Lord Gumtree.
Sunrise on Big Grassy – never gets old
Remnants of snow on Big Grassy - Ozymandias - a respite from climbing Lord Gumtree
Remnants of snow on Big Grassy – oh yes, that is the only somewhat flat and level area.

In the morning rapping down to the ledge to do the crux was too daunting. Especially knowing I’d be digging out wet mud and grass to try and find marginal RP placements with a possible chance of a ledge-hit should I blow it on the crux. This was apparently proven by Tony Dignan but I don’t have any details – if any body knows the story please reach out.

I didn’t have the heart to down-climb to the Dirty Sloping Ledge and resume the wet, cold suffer-fest directly into the crux pitch.

I retreated onto the familiar upper pitches of Ozymandias Direct…

Pitch 4/5:

As for Ozy Direct.

A pleasant (relieving) jaunt up the corner on solid gear (large nuts).

Pitch 6:

I met the fellow climber again at the Great Roof Belay where he caught up to me and would traverse left to take the original route. I remember commenting about the chances of running into another aid soloist on the same route and we took some pics of each other in our wildly exposed predicaments; myself hanging on some tat under a roof and Alec tip-toeing a free traverse, flat into the wall. Both some 140m off the deck.

Big roof - Ozymandias
Cursed Ascentionist gaining the roof
Fellow climber Alec on Ozymandias Original
Alec stepping out (light and fast)
Cutting loose the Pig on the Big Roof - Ozymandias
Cutting loose the pig

Pitch 7:

After this point we would not see each other again. My boost in spirits waned and I went into overdrive. I wouldn’t be spending the planned third night at Gledhill Bivvy. Instead I became determined to finish the route and extricate myself not from the climb but from my own thoughts and feelings. And so I continued in one more push which would take me through to the early hours of the morning, topping-out in two-days what previously took three very long ones.

Tat in the Pontooth on Ozymandias Direct
Truly sickening fixed-gear on Ozymandias Direct (in the pea-pod) – yes, that is a downwards-pull rusty piton in a wedged chockstone and a welded-in micronut with tat on the other side.

Pitch 8:

On my first attempt of Ozy I commented the following about Pitch 8:

“Contemplating a simple but critically exposed and run-out free move to gain the ledge below the P8 chimney; meanwhile the clouds a closing in!”

Free move: Climbing without unnatural aids, other than those used for protection.

This time there were no clouds to be seen – only the pitch black of darkness. It was nearing midnight in winter, and the free move is now a very wet and slippery slope. I couldn’t make any purchase on the wet slime. After deliberation and several attempts I began trying to use a micro offset nut as a point of aid in the shallow, flared, wet crack. It would not hold even the most minor bounce test. I managed to gently ease my weight onto the piece.

Try not to breathe…

I gingerly took a step up and another and suddenly I heard a sharp ping as the RP shot out. I face planted the wall. In the moment it took to process what had happened, the rock was whizzing past my face and the rope ripping up through all the gear. I was sliding rapidly towards the edge!

The rock in front of my face disappeared suddenly and I myself free-falling as I shot off into the black.

The first piece of pro below my doomed aid point had blown out and I’d just taken an absolutely sickening whipper. The wet slope acted like a water slide launching me face down, feet first off a ledge and into the darkness! I believe this was around a 6m whipper from the ledge.

Whipper: A lead fall from above and to the side of the last clip, whipping oneself downwards and in an arc.

Sickening Fall from the wet P8 free moves on Ozymandias Direct
Sickening Fall from the wet P8 free moves

After I got my heart rate under control I jugged back up to the ledge and contemplated the awful prospect of still having to climb the water slide that just spat me off. I managed to do it with free moves this time as the prospect of taking the same fall again chilled my already freezing bones.

The thing about aid falls unlike with free leading is that you have no time to anticipate or prepare – they happened suddenly, without warning.

The piece that held
The piece that held – a number 9 Rock

Pitch 9/10:

As for Ozy Direct.

The thrutchy chimney leads to straight forward #5 cam jugging up a corner flake. I was on full auto-pilot by this stage and topped out a few hours before sunrise.

Escape to Reality

Could hardly lift my arms or focus my blurry eyes. Slept in car at bottom of the mount. Woke early.

Picked-up coffee and some cinnamon doughnuts in Bright. Caffeine and sugar. Began the home journey back over Mt Hotham.

During the drive I contemplated my achievement and shortcoming.

I contemplated what had occupied my mind these past three days.

Nobody told me there’d be days like these

John Lennon
Beautiful Mt Feathertop and the Razorback
Beautiful Mt Feathertop on the return towards Hotham. Bungalow Spur to the left.

One Day

I hope to meet the challenge of climbing Lord Gumtree and experience the mystery of the Gumtree Bivvy. The only description I have been able to find are words from first ascensionist Chris Dewhirst referring back to 1971:

The line of bolts creating the two tier hammocks position was fantastic. Pete and I slept well and we handed food and drink up and down the bivvy.

Chris Dewhirst

If I ever climb Lord Gumtree again, I would like to take the time to really enjoy it the way Dewhirst described. Perhaps it is an adventure better suited for a team…

Looking back on this whole experience, I can see a real opportunity to climb light and fast in a single day. Eliminating the need to haul and pack-down Bivvys could easily free up 30% of the time taken. Perhaps Ozymandias Original… I have heard the upper chimney pitches are hell for hauling.

Aid Climbing Shoes
After the ordeal. I was actively taping my shoes together to protect my feet during the latter part of the ascent. Needless to say the hike back to my car through the snow was quite something.

A short piece I wrote in 2016 about my first experience in Singapore Changi Airport – my first time solo overseas.

First impressions last.

First impressions of Singapore Changi Airport:

Upon arrival the humidity hits you all of a sudden, like being flicked by a wet towel in the locker room… Then the smell of 1970s casino carpeting tainted by the tropics permeates the air. Vast expanses of musty 1970s Casino carpet as far as the eye can see. The transit lounge is huge. I went into the little boys room to relieve myself and an asian man bellies-up to the urinal beside me with an air of confidence. After answering his call, he proceeds to flush, turns 90 degrees away from me, rinses his hand in the gushing urinal, then finishes by what I can only assume was a refreshing splash of cold water on his pecker… Well it is hot and sticky in here…

After browsing the duty free I ate a mexican chicken burger with nachos in it. They have Starbucks. Now I am lounging by the rooftop swimming pool sipping a long island iced tea and taking in the wonderful aroma of jet fuel lingering in the thick humid air. Planes are landing and taking off around me. The relief of the pools mild water is only transient… I don’t want to leave the pool.

TLDR: there are lots of good smells here

Singapore Changi Airport Swimming Pool
Changi Airport best kept secret

Try here if you’d prefer a more mature assessment on the experience of foreign travel.

Sanganeb Lighthouse - Bur Sudan

Solitude and Commitment

Solitude and Commitment: On climbing, travel and life. A 2020 retro-post.

Climbing and the Runout

Runout: A lengthy or unknown distance between points of protection requiring committing moves and in some cases perceived as frightening or dangerous. May also be used as an adjective to describe a route or part of a route; or as a verb, for example to describe the act of running-out into unknown terrain.

In higher grades of traditional (trad) or aid climbing, sections of climbing are encountered where protection is not present or forthcoming. “I fancy I can get a piece in after that feature” I whisper to myself reassuringly; or simply “I fancy it”. This is my response to whatever imagined protection may lay ‘around the corner’. Or to whatever objective risk I estimate in my head… 2 metre fall or 5 metres? Clean? A pendulum-swing? I quiet my mind and run it out resolutely.

In trad it may be a sequence or a couple of runout moves. Moves to reach that next bomber piece on the tricky pitch of a climb. On aid it may be ten-, twenty-minutes of what feels like an eternity runout on the sharp-end. Negotiating sequences of body-weight only gear placements to reach potentially marginal protection only. Not just once or twice but over and over again for a one or several days of climbing.

Sharp-end: The end of the belay rope that is attached to the lead climber. “Being on the sharp end” refers to the act of lead climbing, which is considered more psychologically demanding than top-roping or following, since it may involve more route-finding, as well as the possibility of longer, more consequential falls.

The most challenging or difficult part of an activity.

Solitude and Commitment

Superficially these moments may seem scary, stressful, critical. But in all of these moments, only after I commit, my mind is quiet. Focused. Focused single-minded on the next movement in a sequence bringing me inevitably closer to a point of relative safety. These are moments of extreme clarity. These are also moments of control. Moments when I alone am absolutely, irrefutably in control of my destiny.

I yearn for these moments as a respite from the chaos, stresses and anxiety of normal life; and as affirmation of my personal agency.

Pyramids in Sudan
Pyramids in Sudan

Diving

There are other times too. Preparing for a cave dive where amongst other risks, a physical ceiling prevents direct surfacing to air. Or technical diving where a non-physical but insidious “decompression ceiling” prevents direct surfacing, without risk of severe or fatal bends.

Apprehension gradually increases as I visualise the planned dive and emergency procedures until the moment that my face goes below the surface of the water. From that point of psychological commitment my mind turns to pure clarity and focus. Focused one-by-one on the sequence of movements that will complete the goal returning me to safety.

Driving

Hell, even that last-chance overtake on the final straight-away before the mountain pass. An on-the-fly estimated risk with catastrophic consequences but you know the machine, the gear, the placements… A low enough likelihood of consequence that you “fancy” your chances and resolve to commit. Only one thing for it, drop a gear, open the throttle and make the pass. I’d love to be a rally driver.

My vocation as an engineer is heavily predicated on risk-management. Perhaps that is all this article is really about? Risk-management. The runout is just allegory. No. It is more – the psychological or actual commitment of one’s being to an end.

Travel is like Climbing

In a moment of trepidation in downtown Cairo I caught myself whispering “I fancy I can make it”. I was about to commit myself by entering the Embassy of the Republic of the Sudan. Embarking on a solo overland backpacking journey from Cairo to Khartoum.

There would be many moments on this adventure when I would reassure myself in the same way. Assessing the risk and knowingly stepping out from social, legal or governmental forms protection. A kind of travel runout.

Embassy of Republic of the Sudan; Cairo
Embassy of the Republic of the Sudan; Cairo

It occurred to me that traveling really is a lot like climbing.

Often when people first develop an interest, they start of in a social setting, on predefined, objectively graded routes, with a guaranteed safety mechanism, partner, and ample insurance. The fixed routes and abundance of other participants are a motivation, a comfort and a point of interest. But perhaps there is a kernel of annoyance or a restriction.

This was me when I first joined the local climbing gym. I clawed my way up coloured-plastic grade 8 top-ropes with clenched teeth. The guided tour bus of climbing.

With time some people may yearn for the more intrepid experiences without giving up the convenient safety nets of the climbing gym. Perhaps they join their first local university club for a taste of outdoor sports climbing. A solid belay, no runouts – and fixed bolts reliably appear just right where you need them! The intrepid tour of climbing.

Some will still not be satisfied and begin to explore trad (traditional) climbing. One must locate and assess the route, select and rack up the required gear and place it correctly at specific intervals to ensure safety throughout the climb. You still have your partner or team for support. This is like organising your own overseas journey. Ensuring the transportation, accommodation and insurances are all in place to provide a safe and enjoyable trip.

For some sickos this is still not enough.

Ultimately I have enjoyed to travel the way I have enjoyed to climb. Chasing those zen moments. Solo. Committed. Runout on the sharp end.

This is how I found myself disembarking a bus into the far north-western tracts of Egyptian desert. Some 50km from the Libyan border, an Oasis dotted by mud-buildings, palms and the most ancient and remarkable mineral springs.

This is how I found myself one of only two foreigners on a passenger ship in the middle of a 525000 hectare lake, itself in the middle of the largest hot desert in the world. Nothing but burning sand for some 4000km to the West and beyond the hundreds of kilometers of desert to the East only the sea to be found.

I was entering a country with no diplomatic relations to my own. A country where I could not derive any consular assistance and would struggle to secure resources or evacuation in a state of emergency. A country which in the same year had suffered heinous state perpetrated genocides, continued civil war, and undergone a popular revolution overthrowing their dictator of 30-years. I was crossing the border from Egypt into the Republic of the Sudan, over Lake Nasser.

This is how I found myself woken at 3AM to be led by strangers into steerage amongst dozens of dark faces with limited or no English comprehension. I would be holding an insulin syringe in one hand, sugar in the other, confronted by a man slumped on the floor in diabetic coma. (A pensive nervous wreck, I joined the Muslims for their dawn prayers!)

This is how I found myself alone – within this vast, arid country – the only deranged sicko stepping off a bus halfway along an 800km highway in the middle of the burning desert, 300km from the nearest town. I had two options: hitch-hike out or sleep exposed in the sand with only the snakes and scorpions for company.

This is how I experienced the most tremendous and rewarding travel experiences of my life; and how I met so many of the kindest and most generous people on this planet.

Friends on Ship to Sudan 2
Some of my friends on the ship to Sudan

Life and the Runout

After six months without working, an aid solo attempt at climbing Lord Gumtree in winter, and 4 months of challenging solo travel, I realise I am still reaching for that even greater piece of protection in an even bigger runout. I have used up a lot of my gear to get this far!

I have returned to my country still alone without a home. Without a job. Luckily I have secured some “aid placements” through family and friends to help me reach this next critical goal.

After every runout in life, even if I fall, I fancy I can reach the next piece just around the corner. Just like climbing.

In life as for climbing, don’t be overcome by the subjective fear of the fall. Assess the objective risks and consequences, prepare, and run it out!

If in doubt; run it out!

Very questionable advice

Addendum

In the time between writing and posting this article, my country has overcome the most devastating and extensive wildfires ever recorded.

The world has succumbed to a crippling pandemic – a situation which is still in flux.

At the beginning of the year I was fortunate to find a place to live (which would turn-out to be a COVID epicenter in my city) and a new employer with immediate travel requirements to Europe.

As Norwegian restaurants, and other businesses shutdown around me my last few ‘business’ meals were microwaved TV-dinners (a luxury compared to dehydrated hiking packets!).

I returned home on one of the last regular international flights. Many others were delayed and cancelled. I passed immigration 20-minutes prior to the implementation of unprecedented mandatory quarantine measures.

Now over twelve-months have passed without climbing or diving. A most unwelcome surface-interval.

A surface interval (SI) is the time that a diver remains out of the water between two dives. During this time, the nitrogen absorbed during the first dive continues to off-gas, or to be released from a diver’s body.

I am resolved to seek adventure in 2021, regardless of circumstances.

Addendum 2

In the time since first editing this article, I’ve remained on the fence about publishing it. The pandemic has continued relativity unabated. As vaccines are administered in the first-world, global inequity has of-course allowed the evolution of newer more virulent strains. These strains are diminishing the effectiveness of our response, possibly rendering it futile.

I suppose lock-downs, confinement, and home-working have taken their toll on my motivation. I did manage one notable adventure at the conclusion of 2021; but as it would turn out this was more than I’d bargained for. The pandemic has also taken it’s toll on my physical condition.

I am resolved to seek adventure in 2022, regardless how small.

Mount Feathertop East-facing cornices. Beautiful and deadly.

Mount Feathertop Winter Ascent and Razorback Hike

An Alpine Adventure

This year I completed a solo Mount Feathertop Winter Ascent and snow-shoe hike across the Razorback. Hoping to improve my considerable lack of experience in alpine travel and snow camping I did this the best way I know how: jumping in the deep-end!

I planned a four day adventure hike taking in Mount Feathertop Summit and the Razorback with two classic spurs providing ingress and egress: Bungalow Spur and Bon Accord Spur. This meant spending three nights camped above the snow-line and hiking in snow-shoes with a full-complement of winter survival gear.

A daunting prospect for my first multi-day hike, and first snow-camping experience!

Mount Feathertop is Victoria’s second highest peak at 1922m. Although humble by global standards, it is considered Australia’s most technical mountain (this does not say much for Australian Mountaineering!). Unlike other Australian peaks, Mt Feathertop develops a classic snow-cap: steep and pointed with prominent cornices.

The Razorback is an exposed rocky spine joining the Mount Feathertop to Mount Hotham at close to summit height. It’s 11km are largely above the tree-line. The Razorback is severe as it is beautiful.

Preparing for a Mount Feathertop Winter Hike

As I was not taking any climbing equipment on this adventure I decided I would suffer the weight-penalty to cook all fresh-food. While eating only dehydrated meal pouches for 4 days and carrying my excrement in a container up a 300m rock wall, I discovered intimately that “back-country cuisine” makes your sh*t smell like “back-country cuisine”… Needless to say I no longer reach for the dehydrated meal pouches as my first choice of sustenance…

Fresh food is an interesting and bad trade-off: For 4 main meals I increase weight by about 4.2kg, but I will use 1 litre less of water. This is an insignificant change in fuel requirements particular if I am already melting snow for drinking. On the other hand it reduces the total amount of water I need to carry on a day-to-day basis, and the time taken locating springs or melting snow.

My fresh meals are around 1kg each once cooked (probably a bit less due to evaporation) and also provide lunch the next day; whereas the dehydrated meals will be only around 320g providing minimal sustenance and no lunch.

Overall dehydrated is much more efficient if you can stomach it – for me I’ll save this distinct pleasure for when it’s really necessary. Besides the added weight will only benefit my training.

I prepared the following, ready to cook:

  • Pizza dough with a pouch of chopped pizza toppings
  • Butter chicken in marinade with coconut-rice pouch
  • Seasoned taco filling
  • Fresh naans, English muffins and tortillas
  • Ham, bacon, eggs, cheese and butter.
  • Tomatoes and avocado,
  • Chai tea and fresh ground coffee
Fresh food for Mt Feathertop
Selection of Fresh food for Mt Feathertop.

To offset my gourmet feast, I decided to swap my two-man hiking tent for a Bivy bag and ultralight tarp – the same system I used on the Ozymandias approach.

I now had my base-weight down to 15.4kg including about 620ml of liquid fuel. Add to that 5kg of food, 1.7 kg of water, a camera and some other miscellaneous crap and I was looking at a 24kg total.

Weight distribution for Mt Feathertop Winter Hike

As comrade Dyatlov would say “Not great, not terrible”…

Gear load out for Mt Feathertop Hike
Piolet, snow-shoes, camp stove
A couple of new toys: Piolet, Snow-Shoes and white-gas stove

My main concern was condensation on the inside of the bivy sack reducing the insulation of my down winter sleeping bag. Hopefully with enough ventilation, the only condensation will be on the outside of the bivy sack or under the tarp.

As it turned out, basic overnight warmth would be my biggest problem.

Dangers of Mount Feathertop Winter Ascent

Cornices on Mt Feathertop and the Razorback have contributed to numerous accidents over the decades. Hellfire and Avalanche gullies are so named for a reason!

Cornices on Mt Feathertop
Cornices on Mt Feathertop South East Face.

Tom Kneen, a Melbourne University Mountaineering Club member, died on the Mount in 1985. He and two companions had unwittingly strayed over the cornice in white-out conditions when it gave way beneath them. Being closest to the edge, Tom was lost under the avalanche debris. The others suffered only a fall.

By chance I met one of the three companions in a local outdoors shop the day before my hike. He was by no means the first to tell me of the insidious Mount Feathertop cornice, but hearing the story first-hand became a vivid warning.

The trail from MUMC hut to the base of the summit is named after Tom Kneen.

The interior circumference of the MUMC hut contains the names of members who have perished in Mountains around the world, several on Mount Feathertop.

Day 1 – Bungalow Spur Ascent Hike

Bungalow Spur is a well defined trail leading from Harrietville to Federation Hut and the Mt Feathertop summit. Far less technical than my South-Side approach to Ozymandias, I underestimated the difficulty of a long and sustained climb. It is considered a grade 3 hike and rises 1400 metres over 12.5 kilometres. In winter perhaps half will be under snow.

I wake at 0600 and depart by 0730. Another road trip on the now familiar Great Alpine Road, this time with snow chains ready! I set up altimeter and temperature monitors on my car tablet and observe the elevation gain and concomitant temperature drop with intrigue.

At 1350 metres I see my first glimpses of snow, and I can’t wipe the childish grin from my face. This snow-line observation may help orientation on the hike back up.

I drive cautiously through the Hotham Alpine Resort. 2WD: must fit chains, AWD: chains recommended. I decide to hit it raw and the Subaru did not disappoint. The greatest risk was the swathe of wayward skiers and boarders criss-crossing the village. I descend to Harrietville down the steep twisty road.

I arrive at the Bungalow Spur trail head at 1230 and fill out the intentions book. There is a school group ahead of me staying for a night at Federation Hut.

Bungalow Spur Trail Head
Bungalow Spur - Mountain Ash giving way to Snow Gums and evidence of fires
Bungalow Spur – Mountain Ashes give way to Snow Gums and evidence of fires

Initially I move fast on well-graded terrain, but the grade soon steepens. Within a kilometer I encounter my first challenge: heat and moisture management.

Bungalow Spur Clouds
Clouds closing in on Bungalow Spur

I strip down to my wool under-shirt and roll up my pants. I would hike this way well into the snow-line and sunset. Conscious that any moisture on my clothes will freeze overnight I am forced to unnaturally slow my pace. Difficult when you are excited, with burning quads, and you just want to set up camp already!

T-shirt in the Snow, Bungalow Spur
T-shirt in the snow – Bungalow Spur

Thermal management is a fine balancing act – move too fast and the sweat reaches critical-mass… stop moving for more than a minute and the moisture evaporates, creating a highly efficient air-conditioner in the already plunging alpine temperatures.

First signs of snow, Bungalow Spur
First signs of snow on Bungalow Spur!

As I begin to encounter snow again, my pace slows considerably and overheating is now much less of an issue. I find the path well-beaten (by the preceding school group) and do not have to put on my snow-shoes until I reach Federation Hut later in the evening.

More snow on Bungalow Spur.
Sure enough, more snow!
Bungalow Spur trail in snow.
The trail is now completely covered in snow.

A small spring exists a couple of hundred metres south-east of the trail from the Old-Feathertop Hut Site. Even in the snow, I found the spring flowing abundantly (though no crystal brook!), and filled my Nalgene bottle. Don’t be fooled by the marshy weeping section over the track – listen and continue: you can hear the spring a little further along.

Spring signpost - Bungalow spur
Sign-post for Spring- Bungalow spur
Spring on Bungalow Spur
Small but gushing spring!

Despite warnings I encountered no complications drinking this water untreated and I enjoyed it immensely! I suspect the fresh snow melt in winter adds to the purity.

Crystal clear spring water
Crystal clear spring water – looks good

The clear Nalgene bottle with marked gradations made it easy to ration water, and see any particles. The wide mouth makes it easy to pack in snow when needed and it can also be used as a hot water bottle. It is heavy but durable, so much so it could possibly serve as a desperate dead-man anchor! I think it is worth the weight over a re-used throw-away.

Dead-man anchor: An object, which lies horizontally, is buried in the snow to serve as an anchor for an attached rope.

I don my pack and push on. It is getting dark now as the sun gets low in the west and clouds move in. I know I am close now as the spring is located near Bungalow Hut ruins, about 2km before Federation hut.

The trail ahead on Bungalow Spur.
The trail ahead, getting dark.
Looking back down Bungalow spur trail
Looking back down the trail

Federation Hut Snow Camping

After 5 hours hiking, I reached Federation Hut at 1730. I acknowledged the school-group, hung my t-shirt in the hut to dry and continued halfway to the saddle, where I could be secluded.

Clouds from Bungalow Spur
Stunning clouds to the south west as I approach Federation Hut surrounds. Don’t forget to look behind you from time to time!
Federation Hut surrounds, looking towards Mt Feathertop.

As the sun set, it began raining and I set about building my first camp. It hadn’t occurred to me that rain would be possible at this altitude. This is another challenge of Australian alpine winter. I put on my rain-shells and spent two hours making camp as comfortable and protected as possible. I’d be spending two nights here.

Sunset at Federation Hut surrounds
Sunset as I set up camp

I started by digging a coffin-style pit for my bivouac bag. As I progressed, I discovered I could actually cut out snow-bricks. This was like discovering fire, and I quickly began producing snow-bricks for my other structures. The wet/warm snow made it fast and easy to cut surprisingly square blocks. It was like real-life minecraft and I was really having fun!

Snow pit shelter and tarp
Snow pit shelter

I walled up around my coffin-pit at the head and windward side, and embedded my tarp all the way around. I continued the excavation with a smaller trench at a perpendicular angle forming an area both to sit and enter into the bivy. Using more bricks, I created an arm-chair, and a sheltered cooking bench on opposite sides of the smaller trench! By fitting a hiking pole here I could lift the tarp over the cooking-area as well.

I upholstered my makeshift arm-chair with a foil sheet and square of EVA foam. After 8-hours on my feet, finally I could sit and relax in style, with feet up! Definitely worth the effort.

Snow pit shelter and kitchen area
Snow pit and kitchen area

By this stage the snow was so wet and soft that I was even post-holing with my snow shoes if I was not careful.

I decided to cook tacos for dinner. While boiling snow for water, I figured out I could use a fry pan as the lid to steam up my tortillas. I then put my gloves on top of that to dry them out some, and added my snow shoes as additional wind shields!

Efficient utilisation of heat would be important with limited fuel. Also I didn’t want to sit idle in the snow any longer than necessary to perform basic camp logistics. I had enough hot water for tea, and to fill my Nalgene bottle which I threw into my sleeping bag to warm it. This would also prevent my water freezing overnight.

The tacos were absolutely comfort food – I had made much more effort with the sauce than usual. I left a few in a pan in the snow for the next days lunch.

As it was clearing up, I set out for a night-walk to the saddle, traversing across the southern slope between the hut and summit. The snow was still too mushy and I was often sliding. Even with snow-shoes, it seemed too sketchy. I decided to try again tomorrow with ice-axe and day-light.

I set a candle into the wall of my shelter, using a pot lid as a reflector, like a snow-sconce, and pulled the tarp low. Probably psychological but it felt warmer and I could write my journal by the considerable light.

The sky was totally clear now. The stars were so bright I could navigate without my lamp even though it was a new moon. The three marker lights of Hotham Village shone out across the vastness of the valley.

Later I wandered down to the hut to claim my T-shirt. There were a couple of students and a teacher savoring the last few hot coals in the fire. Despite the smouldering coals, walking into the hut felt like entering a sauna. I shared some stories with the group, they were good guys. I think a few times the teacher may have used me as an example to the kids of “what not to do”.

Probably fair enough.

Snow-pit shelter with sleeping-bag
Comfortable pit for the night

I left for my icy coffin-hole before becoming too comfortable in the hut. The candle-light under my tarp flickered through the barren trees to guide me back to shelter.

My bag was toasty warm and the Nalgene hot-water bottle worked remarkably well rejuvenating my frozen toes. The slightly feet-down slope helped the blood return and I recommend this over a flat lay.

Day 2 – Mount Feathertop Winter Ascent

Mount Feathertop Winter Summit Panorama
Mount Feathertop Summit Panorama

I wake up very early, well before dawn. An Alpine start! Not exactly… I woke up cold. My hips and butt were going numb where they were digging into the snow beneath me. I was cold enough that I couldn’t sleep but not cold enough to get out of my bag (half-naked) and do anything about it.

Instead I languished for a couple of hours in moderate discomfort, contemplating my plight. I pulled the puffer-jacket which was my makeshift pillow onto me but this did not help. Finally I rose. Apparently my sleeping pad had deflated overnight. My body heat was seeping into the frozen ground.

First light in the snow at Federation Hut surrounds
First light in the snow pit

By now my boots were frozen hard and I had to beat them with my fists before they were compliant enough to get a foot in. My gaiters were also frozen and so were my gloves.

Snow-camping - ice under the tarp
Crystals of frozen condensation on the tarp

I drank from my still warm hot-water bottle and used the last 200ml to start boiling snow – enough to make coffee and defrost my second insulated bottle with enough left over for the day. I threw the insulated bottle into my bag so it would not refreeze – this became a convenient daily cycle to warm my bag and maintain liquid water.

Morning in the snow
Finally up, coffee brewing

First breakfast in the snow: Egg and Bacon muffins and fresh coffee. Not bad! It was warm and nourishing. I defrosted and heated my gloves on top of the cooking pot.

Brewing coffee in the snow
Brewing Coffee and heating gloves (and egg)
Snow pit shelter
The pit in all it’s glory
Views of the Razorback and Mt Hotham from the snow-camp.
Despite it’s short comings, the pit has magnificent views of the Razorback and Mt Hotham

Thanks to the clear skies, the temperature is much lower, and the wet snow has frozen solid overnight. It is still early and the surfaces are now hard and icy with good friction. I set out in my hiking boots allowing me to move faster and more efficiently in the hard snow.

View of Federation Hut from the base of Little Mt Feathertop.
View of Federation Hut from close to the saddle.

Traversing the slopes from last night feels much more secure with the axe in my up-hill hand. The snow is also in better condition.

Steep slope to get to the saddle
Steep slope to navigate to the saddle (The cross area)
View of the Razorback from The Cross saddle area.
Awesome vista. This will be my path for tomorrow.

By 1030 I am setting off from the cross. The cross is a saddle formed between Mt Feathertop summit to the East and little Mt Feathertop to the West. The Razorback joins to the South. Once there was a makeshift crucifix marking the location but this is now lost (or removed…).

Directions signs at "the cross" saddle
Directions at “the cross”

The saddle is now guarded alone by a much more fitting sentinel: an ancient, gnarly snow-gum.

Snow gum guarding "the cross"
The wise old snow-gum, shot later in the evening.

Mount Feathertop Summit Climb

Looking to the Summit up South-West spur.  Northern spur to MUMC hut visible to the left.
Looking to the Summit up South-West spur in bright morning sun.
Northern spur to MUMC hut visible to the left.
View to Avalanche Gully from the base of the Mt Feathertop summit.

I finally began the crux of my Mount Feathertop winter ascent. There was no visible trail up to the summit and I broke my own path. This was a treat. Two sections on the summit climb were significantly steeper than the average grade and required me to cut steps with the axe. Kicking steps would have been an option but in any case the axe is a very desirable insurance policy to arrest falls.

Steep final climb to Mt Feathertop summit
The steep final climb to the summit

Taking advantage of the clear weather, I used the map and compass to relate some landmarks on the Razorback. I could make out the Molly Hill cairn and Big Knob but these were relatively close.

Some Mt Buffalo landmarks including Ozymandias - the location of my last adventure!
Some Mt Buffalo landmarks including Ozymandias – the location of my last adventure!
View to the East from Mt Feathertop summit and the North Razorback
View to the East from the summit and the North Razorback

By the time I began my descent it was about 1230 in the afternoon and the sun had moved sufficiently westward to being softening the slope. The snow had melted just enough to ease kicking steps with my heels on the descent. This added considerably to security. I suspect attempting to ascend in the afternoon would be slippery and warrant snow shoes.

Avalanche Gully
Avalanche Gully

There is an antenna tower on Mount Hotham summit that from a distance is like a pin sticking up. This is a prominent landmark visible due South from Mount Feathertop and for most of the Razorback. Later when I trekked the Razorback I used it as a guide. As it gradually grew larger in the distance I knew I was getting closer to Mt Hotham and Bon Accord Hill.

The "pin" tower on Hotham.  Landmark due South of Mt Feathertop.
The “pin” tower on Hotham as I affectionately called it. Landmark due South of Mt Feathertop.
Close-up of the Hotham summit.

MUMC Hut Visit

Looking from the saddle towards Mt Feathertop and the ridge to Tom Kneen track
MUMC hut visible on the tip of the spur

After eating my stale left over tacos I decided that I would snow-shoe to the MUMC hut. Reasoning that I could see the hut from the saddle, and was well oriented to the Summit, I did not bring my map or compass.

Clouds moving in towards the Feathertop Summit
A single climber on the south-west slope of the Mt Feathertop summit
A single climber making their way up the south-west slope of the Mt Feathertop summit

Again, no trail was visible. Instead of traversing around the North-West face of the summit, I continued due North down the wrong spur and ended up in a valley facing a creek. At least I could refill my water.

Stoney creek
Ice-cold Stoney creek

Hopeful I might find a way up another spur across the creek and I found a section narrow enough to cross and began to climb up the other side. The terrain only steepened and closed in. It became clear I was off-route and could not re-join the main spur.

North of Stoney Creek, looking up at the ridge I had mistakenly followed.

Wishing I had brought the map I retraced my steps to the creek (lesson learned!). I certainly did not want to retrace my steps up the steep, slippery spur all the way to my origin! Thanks to modern technology I was able to bring up the Google maps satellite overlay. Clearly the spur I should be on was just East beyond the creek and gully spilling down from the summit. I remembered the spring marked on the map, 0.5km from the cross, on the western face of the summit. This must be the origin of the creek I had crossed.

Rather than the long walk of shame, I decided to plough directly up the side of the next spur. My calves have never burned so hard after snow-shoeing up the very acute slope, high on my toes on every step.

At the top of the spur the path was obvious, and I could see the little MUMC hut perched high on a rise. I had made it onto Tom Kneen track after a fairly epic detour.

Back on route.  MUMC hut visible at the tip of the spur.
Back on route. MUMC hut visible at the tip of the spur. This is the Tom Kneen track.
Nearly at the MUMC hut as the clouds draw in and it gets darker.
Nearly at the MUMC hut as the clouds draw in and it gets darker on the exposed ridge.
MUMC hut peeking through the dead trees and brush

There were magazines and books in the hut. I sat and read one of the MUMC publications. In particular, a trip report on Passport to Insanity – often said to be the best line in Australia or even the universe!

Despite the accolades it is remote and rarely climbed! A giant off-width crack gives way to a splitter hand-crack through a daunting roof, so overhung that it in fact slopes back down from the face! The 8m roof was said to eat-up seven No. 1 cams! Being on the south of the Grampians, you can add to this wild exposure to the severity of southern ocean weather systems.

To complete the final pitch requires a ballsy tyrolean traverse to escape onto the main buttress. Either that or a sketchy and dangerous rappel off a single rusty, possibly now missing, piton. Even less people repeat the final pitch and the original descent. Hmmm…

Back to reality.

The glorious MUMC hut

I prepared to return to my shelter at the Federation Hut surrounds before sun down. The return path was more straight-forward and I skirted across the western face of the summit, re-joining the summit path to the cross. Cloud was now looming ominously over the Mt Feathertop Summit.

By late afternoon the snow was even softer on the Western face, making progress slow and slippery. Several times I found myself glissading uncontrollably even in my snow-shoes!

Mt Feathertop summit shrouded in cloud
Mt Feathertop summit now shrouded in cloud
A view back along the Tom Kneen track ridge

Before setting out to MUMC hut I met a middle-aged couple who had hiked up Bungalow Spur for the day. I had warned them the snow was becoming soft on my descent. On my way back I noticed the gentleman had made his ascent and was coming back down. He must’ve had an epic time on the soft melting face in all those clouds!

Mt Feathertop with whispy cloud
Mt Feathertop in whisps of cloud and late afternoon sun

The nights dinner was going to be pizza pockets. Rolling out dough was tedious but I managed to use a pan lid as a template. Somehow it turned out reasonably well, but the dough was not cooked through.

My toes were now frozen and numb. They felt woody and without feeling. I could not feel myself manipulating them.

I can see the three orange lights of Hotham shining like a beacon. For those late or lost in the back-country it would be a sign of hope. I go to bed early with the idea of climbing the summit for the sunrise before continuing my journey across the Razorback.

Day 3 – The Razorback Snow-Shoe Hike

North-west view from  the Razorback showing Bungalow Spur and Mt Buffalo behind.
North-west view from the Razorback showing Bungalow Spur and Mt Buffalo behind.

The Razorback is a grade 3 hike, but being mostly above the tree-line is severely exposed to the unpredictable alpine weather conditions.

Morning view of the Razorback
Lovely and daunting morning view of the Razorback – today’s destination

No alarm. Cold again. Same story. I woke around 0830. It turned out my phone was underneath the sleeping pad – I don’t know if I didn’t hear it or it froze…

Another morning in the snow
Reflective snow-flake from my winter trip to Finland. Pedestrians use them to be seen in the seasonal darkness.
Firing up the stove for morning coffee

For breakfast I cook another eggs and bacon, this time with left over taco cheese. I drank most of the still warm Nalgene and relaxed. After breakfast I put out my sleeping gear, gloves, socks to defrost and dry in the sun. It is very important to take any opportunity to air out down gear – even in the snow. Especially in the snow.

Packing down camp with beautiful views of the today's trekking
Packing down camp with beautiful views of the today’s trekking
Decorating the trees to dry and de-frost gear
Decorating the trees with gear
Pack fused into the ice needing defrosting
My pack fused into the ice and needed some defrosting

I started to break down camp. Lesson: do not bury a light tarp in snow like I did. At least not when the snow is wet. My entire snow wall had frozen into an ice fortress. I had to chop the tarp out with the adze of my ice axe. As careful as I was I could not avoid cutting up the frozen stiff tarp in several places. I finally extricated the tarp after an hour of chopping put it out to thaw and dry as well.

Tarp in solid ice wall
Tarp in the solid ice wall
Chopped up tarp
Chopped up tarp

There were some new arrivals at Federation Hut. After it quick chat, it turned out their intentions were the same as mine: a Winter Ascent of Mount Feathertop and hike across the Razorback.

The Inviting Federation Hut

I decided to skip a second summit as I had already savored the mount in solitude the day before. This way I could gain a head-start on the Razorback and be relatively alone for the remainder of my hike. I set out from the snow-gum at around 1030.

Sign-post for Razorback under the snow-gum on the saddle.  Mt Feathertop in the background.
Sign-post for Razorback under the snow-gum on the saddle.
Mt Feathertop in the background.
People ascending Mt Feathertop
Guys ascending Mt Feathertop

The beginning of the Razorback trail skirts the West side of Molly Hill through alpine shrubs. The trail is fairly constrained and to my annoyance was littered by deep post-holes. I had to continually pick my steps very carefully to avoid rolling an ankle or worse.

It amazed me how determined these boot-clad gumbies were to carry-on for literally hundreds of metres while post-holing up to their knees! I could see foot-prints in both directions so I anticipated reaching their turn-around point.

Looking back to camp and Federation Hut  from the start of the Razorback
Looking back to camp and Federation Hut from the start of the Razorback
Looking north-west beyond the camp site and Federation hut to Mt Buffalo.
View of Mt Feathertop from the start of the Razorback.
 Closer view of Mt Feathertop.  Avalanche ridge is the prominent central spur.  Adams Rib and Avalanche gully to the left.  Hellfire Gully and Hellfire ridge behind.
Closer view of Mt Feathertop. Avalanche ridge is the prominent spur. Adam’s Rib and Avalanche gully to the left. Hellfire Gully and Hellfire ridge behind.
Looking back to Molly Hill and Mt Feathertop from High Knob.

Just beyond Molly Hill the post-holes tapered out and the trail opened up. Claustrophobic shrubs gave way to steep icy slopes. Here I encountered a group of skiiers. After discussing the trail condition they decided to traverse the steep, bare eastern aspect of Molly Hill – a very exposed prospect!

Biting into the meat of the Razorback

Somewhere around High Knob or Twin Knobs, I discovered my Nalgene bottle was no longer on my pack. It must’ve fallen out and slid into oblivion! This cut the days water supply in half.

View back to the knobs :D and Mt Feathertop
View back to the knobs (lol) and Mt Feathertop.

Unfortunately this meant stopping to boil snow but a chance to enjoy my doughy, under-cooked pizza pockets. Around 1400 I stopped at the lowest point on the Razorback with stunning views of Mount Buffalo to the West.

Impromptu lunch stop with a nice log to sit on.  This would be a potential area to camp.
Impromptu lunch stop with a nice log to sit on. This would be a potential area to camp.

Unlike Big Grassy, Big Dipper very distressingly lives up to it’s name. After passing a small dip and rise you wonder what the big deal is. Well the joke’s on you – that was only Little Dipper! As you rise above a crest, you see it and despair. Climbing out of the Big Dipper is a very steep and strenuous ordeal. Perhaps more strenuous than the Mount Feathertop summit itself, though I did not have my 20+kg pack at that stage.

Bon Accord Hill where Bon Accord Spur intersects the Razorback.

I finally reach the intersection to Bon Accord Spur just before sunset. If I wanted to find any semblance of shelter I knew I would need to get off the exposed ridge line.

Bon Accord Spur heading off into the sunset.

Camp 2: Bon Accord Spur Old Hut Site

I began to hike down the Bon Accord Spur until I hit the treeline and decided to stop at the first flat piece of ground.

Sun setting by Mt Buffalo
Beautiful purple colours in the snow as I head into the tree line.
Getting dark as I finally find a suitable flat spot to set up camp.

It was not much but according to my best guess was near the location of the “Old Hut Site” (not to be confused with the “Bon Accord Hut” ruins). Night was closing in. I almost continued to search for a larger area but it is lucky I didn’t. The next day would prove no decent flat area for perhaps a kilometre of vague trail.

Final glimpses of the next day's path as the sun sets.
Final glimpses of the next day’s path as the sun sets.

The flat spot was just big enough for a single person to lie, and I had to shore up the edge with packed snow to gain a little more shoulder space. I created a much more temporary shelter this time as I planned only for one night. Somehow my cut-up tarp held and I guyed it out tight and low.

The first and only flat spot for several kilometres.  Setting up camp in the dark.
The first and only flat spot for several kilometres. Setting up camp in the dark.

Since I lost my Nalgene bottle, I had been forced to melt snow twice as often and would need to do so the next day too. My fuel supply was now dwindling and I was concerned I would run out that night. After days of wearing frozen boots, my toes were very numb.

I always avoid building frivolous campfires; however under these circumstances I believe a fire was justified. Being below the treeline, wood was now much more abundant and I was situated on a less popular and poorly maintained trail. I used fallen dead wood and kept the fire as small and as short-lived as possible. After I had cooked, I scraped up and removed the coals, scattering them in thick undergrowth, and covered it over with snow.

Fire in the snow.  Dried gum-leaf tinder.
Fire in the snow. Dried gum-leaf tinder.

While the fire burned hot, I melted ample snow for several cups of tea and filled my remaining bottle. I cooked the now 5-day marinated butter chicken over the coals and toasted my naan breads. The smoke imparted from the coals added to the wonderful flavors and this was my best meal yet!

As I ate I rested my boots above the coals, until they finally extinguished. Through the black silhouettes of trees, I could again see the high-pressure sodium glow from Hotham Village. My candle gave the comforting illusion of warmth and a light by which to write my journal.

Cosy but temporary shelter

Day 4 – Bon Accord Spur Descent Hike

Bon Accord Spur is a grade 4 hike, very steep, overgrown and largely unmaintained between The Razorback and Ovens River (the majority). It was the original (and at the time only) access to Mount Hotham in the days long before the Great Alpine Road was constructed. In these early days skiiers and gold prospectors would make the steep hike with assistance of pack horses. I had no such luck and packed my own gear but I guess they didn’t have ultralight technical materials back then either!

The low slung tarp shelter on a shored up flat
Bon Accord Camp is all packed up
View downhill to the West - the final leg of the journey
View downhill to the West – the final leg of the journey

The trail from the snow line is so overgrown it is essentially a corridor of large gumtrees densely packed with smaller gumtrees. All you can do is thrash your way through climbing over or under the frequent fallen branch or trunk.

The Bon Accord trail - a corridor of small eucalyptus trees.
This is the actual trail in 2019. A corridor of small eucalyptus tress. For a one or two kilometres no less!

As I was beating through the scrub I was eagerly searching for the Bon Accord Hut ruins. Only a chimney remains and the map stated it is easy to miss.

Eventually I came to a clearing choked with bulldozed trees and rough cut logs. In typical Parks Victoria Fashion there was an ugly metal sign planted directly in front of the historic stone chimney, ruining the feeling of the place. I’d rather have searched and not found the chimney than run into this stupid junk sign ruining the sense of mystery and wild.

The Old Bon Accord Hut site Chimney

By this time I was working up a thirst and I was glad I had a full bottle of water from last nights snow-melting efforts. I thought I will ration it out as I will not be able to refill until reaching Washington Creek / Ovens River. I took several big gulps and nearly spat it out! The water tasted like campfire ash. Disgusting, but it was all I had for the next 5 kilometres.

Bon Accord Spur Trail - below the snow line but plenty of frost!
Bon Accord Spur Trail – below the snow line but plenty of frost!

Bon Accord spur offered sporadic glimpses of the Razorback, Mt Feathertop and the Bungalow Spur. Only then did the full scale of the landscape become apparent. I enjoyed it every time as a strong sense of accomplishment overcame me.

Bon Accord Spur scenic glimpses of the Razorback.

Needless to say arriving at the river was a great relief. Tipping out the remaining water I filled my bottle fresh from the rapidly flowing creek and drank a litre on the spot. I could see where the Washington Creek had risen high around the start of the little bridge but there were no issues today.

Bridge over Ovens River and Washington Creek confluence.
Washington Creek flowing rapidly where I filled up my water.

I’ve read that in past floods, the bridge had been torn clean off. I could see some remains deposited one hundred metres downstream. I paused to take some photos and thought about the destructive power of water and how high it must’ve been to tear the bridge away from its foundations.

The confluence of Washington creek and Ovens River.  Bridge in the background.
The confluence of Washington creek and Ovens River. Bridge in the background.

The remainder of the trail West of the river was well graded and well-maintained. It snaked through long tracts of rain forest and remnants of the areas gold-mining history were apparent. Several sluice run-offs crossed the path and were made abundantly apparent by the brief, isolated and unnecessary Parks Victoria hand-railings.

I made a fast pace and was determined not to stop for lunch. By early afternoon I reached the Bon Accord Trail Head and began the 1.5km walk of shame through the small town of Harrietville back to the Bungalow Spur Trail Head.

Bon Accord Spur Trail Head.  Not quite the end of my journey.
Bon Accord Spur Trail Head. Not quite the end of my journey.
Mt Feathertop warning.

Conclusion: The drive back to Hotham

It was a strange feeling sitting back in my car. I felt a strong sense of relief and at the same time some primal power. I had so much energy under my control. It was barely 30 minutes by the time I had driven back to Mount Hotham summit (perhaps a days hike).

View of the Razorback and Mt Feathertop from the Great Alpine Road
Looking out over the Razorback from Diamantina Hut (Mt Hotham)
The Razorback and Mt Feathertop from Mt Hotham

I couldn’t help but compare the awesome power of my internal combustion engine to my grandfathers humble shellite stove which had slowly but dependably provided most of my drinking water for the past 4 days.

As I drove through Hotham Village, I found Frank Zappa’s Shut Up and Play Yer Guitar on the car stereo and spaced out for the final leg of this Alpine Adventure.


I hope you enjoyed this article and found it inspiring for your next adventure in the Australian Alps.

What would you like to learn more about in a follow up post? Please leave a comment, and don’t forget to subscribe below for more cursed ascents!

By purchasing from my affiliate merchants using the ads on this site, you are helping to cover annual hosting and production costs.

Ozymandias Direct Sunrise

Ozymandias Direct Aid Solo Climb – Part 2: Trip Report

Ozymandias is a classic and colossal aid climb situated on the North Wall of the Mount Buffalo Gorge. Ozymandias Direct takes the longest and steepest line, climbing over 280m. It is considered to be the premier Australian big-wall test piece.

I aid solo climbed Ozymandias Direct over a period of 4 days, spending 3 nights in hanging bivouacs. This was my first solo and first big-wall climbing experience.

Part 1 details preparation leading up to the climb.

Part 2 is a daily trip report with some beta and advice based on my lessons learned.

Glossary of climbing terms. Non-climbers may need this to make sense of all the jargon!

Day 0: Approach

Sunday 21/04/19

Driving the Great Alpine Road over Mt Hotham I briefly glimpsed the wildly exposed Razorback. A cloud-swept rocky spine spanning Mt Hotham and Mt Feathertop at summit height. An image that would stick in my mind.

Comparing the Razorback to the relatively sheltered Mt Buffalo gorge reduced any anxiety I had about Ozymandias.

In Bright I located a fantastic little outdoors shop, away from the main street. I bought some waterproof over-pants – much better than the plastic garbage bags I was otherwise intending to use as a skirt.

I arrived at the Buffalo lookout around 1300 and geared up in front of a confused family having a picnic. Departed towards the south side trail around 1400.

Ozymandias seen from the Tourist Lookout
Ozymandias from the Tourist Lookout.
Heading down the valley.  Ozymandias in the background.
Heading down the valley.

Approach via South Side Trail

Mushroom Rock on the Ozymandias approach.
The famous Mushroom Rock.

I cannot overstate the seriousness of this approach.

Descent is difficult with a backpack. Heinous with a haul-bag. Would have been impossible without solid trekking poles. Foreshadowing what I was about to embark upon, I found myself “aid-hiking”. Finding placements in the rock where the carbide tips of the poles could make purchase.

The heavy load on my back continually compromised my balance, forcing me to bear down on the poles. On some rocky slopes, I could see the pole flexing. Right on the margin of performance of my shoes and the poles; shifting the weight any further back onto my feet would risk the shoes sliding out. Shifting any further forwards would mean the poles buckling. Either way would mean tumbling down the gorge with a 40kg load on my back.

There were also narrow traverses where the surface was built up with plant matter and sand, making it difficult to find purchase with the poles. In other places were long ramps covered in loose scree.

This was the most imminently dangerous activity I have done – just the approach hike. The only thing I can imagine comparing it to would be alpine soloing without the snow.

The sections with fixed ropes prove brutal. The first is down a flowing water runnel, and filled with mud. I wrestled with the pig, half lowering it, half cutting it loose and throwing down the poles.

I later discovered the one casualty from this ordeal was my coffee filter cone – thankfully it was still functional.

Past the turn off to “Where Angels Fear to Tread”, was new ground for me.

Ozymandias Direct seen from Angel's Buttress.
Ozymandias from Angel’s Buttress.

Another exposed fixed-rope traverse maneuvers to yet another more brutal rope section. Luckily with a haul-bag lower-off; unfortunately with a steep and awkward rope-ladder. Stupidly still with poles in one hand, I swung out, the pole got caught up in a flake causing me to strain my triceps.

Then a short roped down climb – more of a scramble. Compared to the huge difficulty donning/doffing the pig, it seemed easiest to down climb with it. The bag shifted and pulled me off-balance, again causing me to swing into the wall while still gripping the rope. I gripped so hard so as not to fall off as my hand and knuckles smashed into the gnarly granite with the force of full body weight and that of the pig.

Only when I got down from the rope and saw blood dripping all over did I realise something was wrong. Apart from cuts and scratches all over my right hand, one knuckle was missing a chunk. Not just cut, but a cavity scooped out of the front. I put on some band-aids and carried on.

Later that night, I would inspect the wound, and see what looked like distinct fleshy cords, as I flexed my finger.

As I descended into the gully floor I could hear flowing water. A beautiful sound. To save weight I only hiked in with 1 or 2 litres, which I had finished. I already felt exhausted, dehydrated and extremely hot but I knew for sure I could fill my 13 litres of water for the next 3 to 4 days.

Cooling down after the strenuous approach hike.
Cooling down after the strenuous hike.

Crystal brook was flowing plentifully. The trail crossed a flowing pond where there were two cascades of ice-cold, fresh, mountain water.

A short way up hill from the brook, on the North side of the gully, I found what seemed like the only clearing. Unlike Big Grassy, this was nice and grassy. Just big enough for a couple of people to lie down. I set up my tarp and bivy-bag, expecting rain. The forecast predicted 15mm overnight.

I filled all the water bottles. The water was so cold I could only fill one bottle before changing hands. The brook was crystal clear, living up to it’s name (unlike big Grassy). I drank straight from the cascade it was so fresh and invigorating. I rinsed my face and hands and felt restored.

Pond and Cascade in Crystal Brook
Pond and Cascade in Crystal Brook. Some Frosty Water Bottles!

I hiked up to the start of Ozy, first with the rack, then with the ropes. This was steep, wet and scrambly. I put the rack and ropes in garbage bags to protect them from the rain. From a small crows-nest across from the foot of Ozy (a good bivy option maybe for one) I pondered the climb. Specifically, how to solo the first pitch.

Gazing up from the foot of Ozymandias Direct, Australia's premier big-wall aid climb.
Gazing up from the foot of Ozymandias.

I set out to build my first ever solo anchor out of trad gear. All I could see was a knife-thin crack, a small shrub with exposed roots, and a dubious, rusty hex-head bolt.

The best I could manage in the crack was a brass RP micro-nut oriented for upwards pull, equalised to a small bootied ball nut (from The Shroud at Mt Arapiles) , all held in place by a directional-opposed HB micro-offset.

I equalised the nest of nuts to a sling around the base of the small shrub and brought it all up to the dubious hex-bolt.

Off to a good start. The next morning I would stick-clip the first (real) bolt, and clip off the pig to absorb some shock in a fall.

Night 0: Approach Bivouac

I returned to my makeshift camp, and laid down on a fallen down tree trunk. It crosses the path from Crystal Brook to the small clearing and Ozy. The tree was pointing out east and dead straight down the gorge, like a giants diving board. I stretched all my burning muscles and laid down to rest my back.

The Fallen Tree, near Crystal Brook
The Fallen Tree.

While I cooked dinner, I could see the sky flashing sporadically from above the gorge rim. I was unsure if this was people with torches or a camera, but I couldn’t see anybody. I couldn’t see at all above the rim of the gorge. A possum startled me in the twilight and observed me eating. He was probably quite familiar with climbers being in this area.

Finally a chance to stop and rest in my makeshift shelter. I took some time to inspect and clean the wounds on my hands. Flexing the finger I had smashed up earlier, to open up the wound I doused it liberally with hand-sanitiser and wiped it out. I could see what looked like distinct, fleshy cords nestled in a split within the scooped-out chunk of my knuckle. I checked for movement. Luckily they were not compromised. When I smashed into the wall, the rock must have carved out a chunk and as I was gripping so hard it just split down to the tendon.

Remembering the superglue I packed, I glued the split shut and capped over the hole. I continued to glue over the many other cuts on my fingers and hands, and the tip of my index finger I had sliced while packing on Friday.

By the time I had patched myself up, the storm rolled in over the rim. The sudden intensity and volume of rain was astonishing. I had to lower down the tarp to just above the bivy sack (just above my face), and prop up the centre with the haul-bag. I frantically pegged two corners with my only 2 pegs, and tied down the others to a log beside me.

As I was camped in the floor of a valley, everywhere became a water runnel. The heavy rain beat down my tarp, and huge amounts of run-off washed around my bivy sack. I tried to divert the water with any sticks and stones within reach. My efforts seemed to work – I stayed dry and fell asleep to the sounds of rain and thunder.

I woke once to the the feeling of crawling over my legs. It was the ravenous possum. In the morning I had to clean up my scattered rubbish bag.

Day 1: Pitch 1 to Big Grassy

Monday 22/04/19

Wake at 0500.

Bivouac before dawn
Packing up the bivouac before dawn.

I ate breakfast, packed up camp, and for the final time hiked up to the base of Ozymandias.

I discovered the crack holding my micro-anchor seeping water and the entire wall was wet. No hope for the pitch 1 free slab moves. I flaked my ropes into their rope bags, stick clipped the first bolt, and left my approach shoes on. I was on the wall by 0820 (much later than 0600 as scheduled!).

Ozymandias Direct pitch 1 anchor.
Pitch 1 Anchor: Ropes are set and ready to climb.

Pitch 1

Aiding the usually freed first pitch makes it cruxy right off the deck. The aid moves required precarious consecutive talon and cliff-hanger placements with many falls onto the water-fountain micro-nut shrub anchor. Luckily the slab is well protected by fixed bolt runners.

Pitch 2

Lot’s of hook moves. Consecutive cam-hooks. Felt like the aid crux.

Cam hook blew, two-hooks up and the piece below me ripped out (small cam). 8 to 10m fall. My first big whipper.

Pitch 3

Jesus nut was a brass micro-nut directional opposed to a cam!

Jesus nut, or Jesus pin, is a slang term for the main rotor retaining nut which holds the main rotor to the mast of some helicopters.

Another use for the term is found in rock climbing, in which it refers to the first piece of protection (some of which are also called “nuts”) placed on a pitch. In addition, the Jesus nut prevents the possibility of a factor-two fall onto the belay anchor.

Lots of bomber cam-hooks. I skipped the left-hand ledge (but bootied an offset nut from it 🙂 as there is no rope drag leading solo and went direct to Big Grassy. The final move to gain Big Grassy is not a mantle. More like panicked squirming as you grip onto a tussock of grass, feet skating, trying not to pull it out.

Hauling the pig up, my stomach is aching. It’s already dark. I am so hungry and each heavy lunge on the haul system raises my food only a metre closer. The haul bag gets hung-up. I cannot raise it any further. My prospects of dinner are further delayed while I rig a 3-to-1 advantage pulley system. The bag comes unstuck but now every lunge raises my food only 30cm…

I finished setting up the anchor and bivouac at 2020 after 12 hours consistent climbing. Food and sleep were a matter of urgency!

Night 1: Big Grassy

Big Grassy is neither big nor grassy…

Night fall. The moon is rising big and red. Set up hammock and tarp across corner. Establish camp.

The only flat area is just big enough to set up a stove or take a shit (whoever said not to shit where you eat never bivied on Big Grassy).

Cooked and ate on the sloping ledge. Retired to the hammock to write in my journal and get some much needed sleep.

Day 2: Big Grassy to the Great Roof

Tuesday 23/04/19

Wake at 0500

First morning on Big Grassy! I brew some coffee and enjoy the sunrise across the valley.

The only flat-spot on Big Grassy
The only flat-spot on Big Grassy.
Hammock Bivy set-up over Big Grassy
Hammock Bivy set-up over Big Grassy.
View from the Big Grassy
Early morning view from Big Grassy.

Not expecting to return, I pack down all of the shelter and equipment, preparing it into the haul-bag. I embark on the next day’s pitches.

Pondering the days aid climbing while gazing up Ozymandias Direct
Pondering the day ahead – The Great Roof!

Pitch 4 and 5

Pitch 4 seemed straight-forward climbing – but I don’t remember much. I think I was on auto-pilot (not a good state of mind in the circumstances).

After cleaning and hauling I progressed up to the Great Roof capping pitch 5. The roof grew bigger and more intimidating the closer I came. I had planned to pull through the roof, climb pitch 6 and reach the Gledhill Bivy for the night.

I had already made some small mistakes with my system, and suffered another stuck haul-bag, greatly slowing me down. One big mistake would stop me altogether.

It was getting late in the afternoon. My head ached and I was losing focus. I was calculating if I could just make the lead to Gledhill Bivy before dark and then haul in the dark. The idea of leading the difficult Roof after sunset was daunting. Frustrated, I rappelled down to the P4/P5 anchor, so I could jug back up the haul line and clean the pitch.

As I clipped into my jumars and began to jug, I noticed the lead line not getting taught. Maybe a lot of friction on the rope… Maybe the knot (alpine butterfly) had capsized. Surely not… perhaps I had tied it wrong? I could have anchored the free end where I was situated but I decided against this idea and jugged back up the haul line which I had just rappelled. I discovered I hadn’t fixed the lead line!

At this point it was obvious to me that exhaustion and dehydration were impacting my awareness. That was it. I decided I was on “tilt” (to use a poker term) and would stop for the day.

I lowered the pig two pitches back to Big Grassy, belaying it down on an ATC (it was fairly technical to rig a belay device into the loaded haul-line while hanging from the anchor. The pre-rigged far-end haul device payed dividends). I reestablished the camp which I had only packed up that morning, and dug in for another night on BG.

On Day 2 I have now committed my contingency supplies.

A friend later commented on this story that the biggest risk in soloing is that there is nobody around to stop you making stupid mistakes.

Under the Great Roof, while on rappel.
Under the roof, on rappel.
Big Grassy in view, retreating from the Great Roof
Big Grassy in view, retreating from the Great Roof.

Night 2: Big Grassy

I was startled awake when by a voice below yelling “rope fixed, ready to haul!”. There had been no voices around me for days. I got out of my bag as quickly as possible so I could explain I didn’t realise they were coming up. I knew there were another party descending into the gorge today but I expected they’d only fix the first 2-3 pitches and camp in the gully below. I’m not sure if I surprised them as well. Maybe they thought I’d reached Gledhill Bivy.

I had my hammock strung across all the anchor bolts. I case the party below wanted to come up to Big Grassy, I free up a pair of bolts on the right hand side. This meant re-suspending my hammock onto a bomber nut placement. Aid-camping! There would be more of that to come!

The other party chose to bivy on the small ledge below and left of Big Grassy. In the morning I glanced down and saw them laying like sardines. They had brought a portaledge. Cramped but softer, more versatile and infinitely more comfortable than the rocky slope of Big Grassy.

My apologies to the Godwin brothers if I came off abrupt – I was keen to make my presence known and get back into my warm sleeping-bag as quickly as possible!

That night a booming explosion resonated through the valley, like lightening had struck the bottom. I suppose it was the sound of rockfall.

Day 3: Big Grassy to Gledhill Bivy

Wednesday 24/04/19

Wake at 0500

Treated to an epic sunrise on Big Grassy, Ozymandias.
Treated to an epic sunrise on Big Grassy.

Another day begins on Big Grassy with a phenomenal sunrise! I am pleased that the next two pitches are already fixed and cleaned a 60m haul to the Great Roof ready to go. I feel comfortable to relax and enjoy the sunset over my coffee, taking many photos.

The valley comes to life - looking out from Ozymandias.
The valley comes to life.

Packing up the camp I say another last goodbye to Big Grassy.

Sorting gear on Big Grassy
Sorting gear on Big Grassy.
Ready to leave Big Grassy
Ready to leave Big Grassy. This is about the whole area. The long, flat rock is on a significant angle.

Pitch 4 and 5

Jugged back up my fixed line, while “far-end” hauling the bag past the edge on pitch 5 where it got stuck yesterday. Continued up line and top-end hauled into the Great Roof. Having a far-end haul system in situ on the bag is a great advantage and practically mandatory for solo when there is no partner to guide the bag. Muscling the pig over a lip on a 3-1 takes a great deal of time and energy and damages the pig.

Yes – the Great Roof to Big Grassy on a plumb line is less than 60m.

The belay under the Great Roof was two rusty carrot bolts sticking out uncomfortably far from the rock. I equalised these a metre or so down to a newer fixed hanger, to form a reasonable anchor to haul from. For lead this required some finagling with a lower carrot bolt to yield a redundancy for the upward force.

Anchor below the Great Roof on Ozymandias Direct.
Anchor below the Great Roof.

Pitch 6

Pulling through the roof, I was surprised to find none of the vaunted fixed gear, and aided off a previously glue-reinforced flake that would flex out precariously under body-weight. The glue had since detached from the wall.

Ready to pull through the roof on  - out over the void.
Ready to pull through the roof – out over the void.
The bendy death-flake visible right of carrot-bolts.
Bare crack and the expando death-flake on Ozymandias Direct.
Bare crack and the expando death-flake.

The roof moves hanging on aiders were wildly exposed. Cutting the bag loose and swinging it out was a nerve-wracking experience, but not as much as rapping back own the haul line into free-space, over the roof, metres away from the wall and 160m off the deck. I had to pull myself back into the anchor with jumars.

Rappel over the roof
Rappel over the roof.
Slung bendy death-flake as “the Jesus nut” – epitome of psychological pro.

Psychological protection is a term for piece of protection that everyone knows will not hold a fall, but makes the climber feel better about having gear beneath them anyhow.

I jugged back up into the Gledhill Bivy, cleaning as I went. After hauling ,I docked everything and roughly planned out the hammock anchors. I utilised a three-piece natural anchor in order to avoid the awful rusty carrots that I was even nervous to aid on (definitely NO bounce tests). This also resulted in a better hang.

Rappel over the roof.
Slung bendy death-flake as "the Jesus nut" - epitome of psychological pro.
Gledhill Bivy Hammock Anchor with natural pro.

The Gledhill Bivy is a perfect book-corner protected from the elements by a smaller, but substantial roof.

Gledhill Bivy protecting roof
Gledhill Bivy protecting roof.

Pitch 7

Navigating the Pontooth was a thrutchy and torturous ordeal. The Pontooth is a huge, overhanging, pointed fang of rock disguising a bottomless body-sized off-width beneath it. This hidden Pea-Pod narrows towards the top, forcing your feet out over the void while your arms and shoulders thrutch around deeply, just managing to clip the old brittle-tat on an ancient rusty piton. The next piton is in an absurd horizontal break under a chockstone! But you have to aid off it, maneuvering out over space.

I surmounted the Pontooth, thinking VERY carefully about the task of cleaning out the deep-set yellow cam in the offwidth. I fixed the lines and rapped back down to Gledhill Bivy, and set up the nights hanging belay. Cleaning the Pontooth will be a job for tomorrow.

I made sure to keep a good pair of bolts clean near the corner in-case the party below me fixed up to Gledhill Bivy.

Setting up the Bivy; hanging above the void on Ozymandias Direct.
Setting up the Bivy; hanging above the void.
The other hammock anchor, haul-bag dock and main tie-in point at the Gledhill Bivy
Left to right: The other hammock anchor, haul-bag dock and main tie-in point.
Cooling my feet after a long day Aid Climbing
Cooling my feet after a long day in the aiders.

Thanks to the fixed lines on pitches 4 and 5 it was a relatively early finish (before dusk!). I was able to put on my warm clothes, boil water for a cup of tea, lay back in the hammock and enjoy my lofty perch above the clouds. As it got darker and colder I got into my bag and started dinner. The dehydrated meal pouch made a great hot water bottle as it was cooking!

Boiling water on my DIY hanging stove at the Gledhill Bivy
Boiling water on my DIY hanging stove.
Enjoying the evening sky with a cup of tea
Enjoying the evening sky with a cup of tea.
View to the South Side and "Angels", from Ozymandias Direct.
View to the South Side and “Angels”.

Night 3: Gledhill Bivy

Roof over my head tonight
Roof over my head tonight.

A restless and cold night strung-out in the hammock, 200m off the deck. The insulating down of my sleeping bag, compressed under my weight in the hammock, severely reducing it’s effectiveness.

As an inexperienced hammock sleeper, I found myself pushing my arm slightly to create tension in the fabric and support my head. As soon I would nod off to sleep, my arm would relax, and my head roll off the side. Needless to say, that woke me up very suddenly! Eventually I figured out a way to get more secure in the hammock, but rolling around at night 200m up does not bear thinking about! I wonder if anyone has woken startled hanging on their tether…

Late in the night there was another booming roar of rock-fall. The powerful echo through the valley jolted me awake during the night.

Day 4: Gledhill Bivy to Summit

Thursday 25/05/19

Wake at 0530

Today I wake up on a bed of clouds!

Bed of clouds
Bed of clouds.

I notice a tiny prick of light on the south side. I watched as another party descend the south side trail, weaving their way through the many obstacles. Later in the morning they would begin climbing Where Angels Fear to Tread. I wonder how they fared entombed in the rising cloud.

A party descending south side trail, headed for Where Angels Fear to Tread.

The last day on the wall, with only two pitches left to lead, I take some extra time in the morning. I relax with my freshly brewed coffee and enjoy another perfect sunrise appearing out over the valley below!

The valley is hidden in clouds
The valley is hidden.
 The sun rising above the clouds
The sun rising above the clouds.
Sunrise at the Gledhill Bivy
Ready for a new day!
Clouds receding as the sun heats the valley - high up on Ozymandias.
Clouds receding as the sun heats the valley.

The cloud seemed to be receding as the sun heated up the valley. This wouldn’t be the case for long.

Don't forget to brush your teeth while big-wall aid climbing!
Don’t forget to brush your teeth.
Gledhill Bivy - I don't want to leave!
Gledhill Bivy – I don’t want to leave.
Suspect old carrot-bolts with red hero loops at the Gledhill Bivy
Suspect old carrot-bolts with red hero loops. These were major points I had to aid-off, both climbing and when moving around the bivy.
Big-Wall Accoutrements at the Gledhill Bivy
Big-Wall Accoutrements – everything must be clipped off!

I gradually put on my climbing clothes, packed everything up and prepared to move out. First I lowered out the bag, then I lowered out myself!

I jugged up P7 cleaning my gear from yesterday, up and over the roof that protected me through the night. And the dreaded Pontooth. Pitch 8 offers a hanging belay on a bomb-proof anchor. Nice.

As good as it gets!  Ozymandias Direct Pitch 8 features a bomber three-bolt anchor.
As good as it gets!

Pitch 8

By now, the valley was covered by a bed of cloud, and whispy tendrils were licking their way up the sides of the gorge. As I climbed, the cloud kept rising faster, engulfing my haul bag some 30m below.

Cloud rising up the valley on
Cloud rising up the valley.
Cloud up to the pig
Cloud up to the pig!
Contemplating a critically exposed and run-out free move to gain the ledge below the Pitch 8 chimney.
Contemplating a simple but critically exposed and run-out free move to gain the ledge below the P8 chimney; meanwhile the clouds a closing in!
View to the south side, hidden in cloud
View to the south side – Angels Buttress hidden from view.

The top of pitch 8 is an “easy” chimney. I found it cramped and thrutchy, particular as I had to dig in deep for aid placements. The moist, cloudy air, and early morning condensation, combined with my badly worn down approach shoes, offered little purchase. I thrutched my way up with a combination of aid and free moves, and pulled through the top beneath a big choke-boulder. Cleaning the chimney would prove to be much more tedious.

Now I am at the base of the head-wall, relieved that it is early in the day, and I have only one more pitch to go. I sat and enjoyed my last compressed beetroot-patty roll, admiring the stunning expanse.

As I was solo on a 60m rope, I had enough rope to traverse left to the front of the summit-block, and anchor to the hauling anchor. This required a long runner off a shrub, to keep the lead line away from the corner of the summit block and low horizontal break underneath. I was then able to flick and maneuver the tagged-up haul line, over the shrubs on the ledge and rig it up for rappel – much better than climbing back down the dreaded chimney!

Cutting the haul bag loose from the P7/P8 anchor was a spectacle, as it trundled, spun and swung out left into the cloud. I mad sure to cry out just in case another hapless climber were in it’s path.

Pitch 9

The final pitch, starting beside the beautiful lofty perch of the Alan Gledhill memorial plaque.

Alan Gledhill memorial plaque.
Alan and Geoff were first ascensionists of the Direct pitches 5-7; where their namesake bivouac is situated.
Breathtaking view from the Ozymandias plaque ledge.
Breathtaking view from the plaque ledge.

This final 30m crack is the first and only part of the climb 300m requiring the #5, and second #4 Camalots I had tagged all the way up. It is a big, almost off-width crack, larger than a fist crack and eats up #5s and #4s. For the most part a straight-forward and pleasant affair to cam jug with small pro on the left.

This is a false sense of security as once you get higher up, the crack flares out wider and the pro on the left drys-up. Now I wish I had brought double #5s! I managed to JUST scrape through by planting the #4 arm-deep into the crack and top-stepping my aiders. This way I could just stretch-out to reach what turned out to be the shittiest, mankiest rivets on the entire climb. Rusty, bent downwards and pulling out! I was afraid to even body-weight onto these yet alone assume they provided any realistic protection!

My final placement for the climb was a gold hex.

Ozymandias Direct Summit

Finally, I pulled onto the summit block but no time to celebrate yet. The barrier fence provided a convenient anchor to rappel, jug and haul from.

By around 1500 I had completed the logistics and finally climbed over the fence, elated. After four days on the wall (and an appalling hike), I had achieved the climb I had dreamed of for so long, in the best style I could.

Exhausted but happy, at the Ozymandias summit!
Exhausted but happy.
On top of the summit block.
The cloud had finally cleared.

All that was left to do was the long walk back to the south side of the gorge. I bumped into several more bemused tourists who wondered why I was so dirty, smelly and battered, carrying a ridiculously oversized pack. Some seemed incredulous when I tried to explain.

Half-way back I doffed and hid my equipment where I could retrieve it later by car.

Singing out the intentions book with busted knuckles.

Although I managed Pitch 9 with double #4 and a single #5, if one or both of those manky rivets ever pulled out (very likely), it would become a sketchy bat-hook move at best. In this case I feel as though a second #5 would be almost mandatory, or a #4 with a bit of wood. If you are not tall, then I suggest the second #5 would be comforting anyway. Consider this if you attempt Ozy direct, as it would be very bad indeed being unable to ascend just metres from the top!

The scooped-out knuckle - typical aid climbing injury...
The scooped-out knuckle, caked in superglue and wall-scum.
Thigh contusions from falling on the early pitches of Ozymandias.
Thigh contusions from falling into the wall with gear hanging on harness.

Back home I had many bruises, cuts, and abrasions to take care of, mostly on the hands. Some big impact contusions I only discovered later, which must’ve been from falling into the wall with protection hanging between my thighs and the wall. Small price to pay for such a wonderful adventure!

Stay tuned for my next post – a multi-day snow hike through the Australian Alps!

What would you like to learn more about in a follow up post? Please leave a comment, and don’t forget to subscribe below for more cursed ascents!

ozymandias direct topo notes

Ozymandias Direct Aid Solo Climb – Part 1: Preparation

Ozymandias is a colossal classic aid climb situated on the North Wall of the Mount Buffalo Gorge. Ozymandias Direct takes the longest and steepest line, climbing over 280m. It is considered to be the premier Australian big-wall test piece.

I aid solo climbed Ozymandias Direct over a period of 4 days, spending 3 nights in hanging bivouacs. This was my first solo and first big-wall climbing experience.

Part 1 details preparation leading up to the climb.

Part 2 is a daily trip report with lots of photos, some beta and and some advice from my lessons learned.

Background

I met a traveller from an antique land
Who said: “Two vast and trunkless legs of stone
Stand in the desert . . . Near them, on the sand,
Half sunk, a shattered visage lies, whose frown,
And wrinkled lip, and sneer of cold command,
Tell that its sculptor well those passions read
Which yet survive, stamped on these lifeless things,
The hand that mocked them, and the heart that fed:
And on the pedestal these words appear:
‘My name is Ozymandias, king of kings:
Look on my works, ye Mighty, and despair!’
Nothing beside remains. Round the decay
Of that colossal wreck, boundless and bare
The lone and level sands stretch far away.”

Percy Bysshe Shelley, 1818

Since my humble beginnings in outdoor climbing I have heard brutal and awe inspiring stories of Ozymandias. A intimidating granite gargantuan, split by a relentless crack system, terraced with great roofs, and guarded by a committing and dangerous approach. The wildly exposed 280m normally undertaken with clean-aid techniques requiring gear hauling and overnight big-wall tactics. It has always been in my mind to one day attempt an ascent. My regular climbing partner once suggested the proper way would be for me to climb Ozy with another burgeoning big-wall climber, for the ultimate adventure.

My first trip to Mt Buffalo and my first Trad lead experience involved a committed start on a ledge some 30 metres below the hang-glider ramp, just as some form of alpine pulse-storm appeared out of nowhere. Thank god for the abrasive Buffalo granite. Later I was introduced to the Gorge “big routes” by my regular partner Dan, with a 9 hour free ascent of Where Angels Fear to Tread, a 280m grade 17 fist-crack in mid 2016. Later that year I cut my aid climbing teeth with Dan on the exposed and committing Defender of the Faith. This was an 11 hour ordeal including the multiple rappel approach, covering the first 3 pitches at M3 and a final rope-climb. These experiences taught me the criticality of speed and efficiency to undertaking big routes on a time frame.

Promise

Months and years passed without an opportunity to get on Ozy. I wanted to prove to myself that I was still able to undertake such an epic adventure so going one step further I secretly promised to climb Ozymandias solo by my 30th birthday.

Over the next year I began endurance training through long distance mixed-terrain bike rides. This involved over 1000km in 8-weeks culminating in a 7-hour 120km ride with 1,160m elevation gain, 4-weeks out. Better late than never, I set out the month before my 31st.

Unknown climbers on Ozymandias - 2016
Ozymandias. Unknown climbers on Big Grassy, May 2016.
Unknown climbers on Big Grassy
Unknown climbers on Big Grassy, May 2016.

Day -1: Ozymandias Direct Final Preparation

Sat 20/04/19

Up after midnight, I make final packing arrangements, schedule and Topo notes. I try on the loaded haul bag for the first time, and the weight is shocking. Who knows how I will manage the south-side track. Dan had suggested two walk-ins may be necessary. I hope not being such a heinous approach (both the benefit and drawback of this approach is that retreat becomes a very unappealing option).

It finally occurs to me why my hamstrings have been aching – the previous days moving out of my home for the last year. Good warm-up I suppose.

Route beta, climbing topos and notes.
Scrawls and marginalia. Copyright-blocking nuts.
Guidebooks from Open Spaces Publishing and Rockmaster Publications. Photo-topo from Vertical Nomad.

Plan and Expected Route Beta

Plan is to descend/approach via the south side gorge trail, carrying only 2 litres water for the hike in. The remaining 12 litres of water will be filled from Crystal Brook in the valley floor during the first bivouac. Based on a common 2-day/2-person ascent, the climb solo is planned to span 3 days and 2 nights with hanging bivouacs at Big Grassy and the Gledhill Bivvy. Food and water is calculated for 4 days. In the worst case scenario, a retreat back into the valley should yield additional water but a very daunting escape.

Ozymandias Day 0

  • Descend South Side Trail 2hr
  • Fix P1; 24m 2hr
    • Slab free-moves, stick clip first bolt?
    • Up past 2 bolts, free easily to bolt, ramp into corner
  • Bivouac Valley Floor?

Ozymandias Day 1

  • 0600 Jumar, haul P1; 2hr
  • 0800 Lead, clean, haul P2; 3hr
    • Small RPs to #3, #4 cams. Cam hooks.
  • 1100 Lead, clean, haul P3; 3hr
    • Aid Crux. Medium wires, RPs, micro-cams ,fixed-gear, hooks.
    • Up corner, slightly right into continuation, then eventually move left to small ledge.
    • Grade 10 free moves to gain Big Grassy.
  • 1400 Fix P4; 1hr; 1hr
  • 1500 Bivouac Big Grassy

Ozymandias Day 2

  • 0600 Jumar, haul P4; 2hr
  • 0800 Lead, clean, haul P5 (to Roof); 3hr
    • Don’t go left. Small/medium wires, small cams.
    • Corner to yellow roof.
  • 1100 Lead, clean, haul P6 (thru Roof); 3hr
    • Fixed gear through roof. RPs, wires, tie-offs for old bolts. Bolts to hanging belay (Gledhill Bivvy). Bolts to roof.
  • 1400 Fix P7; 1hr
    • Small wires to #4 cams. Move right before pulling thru roof. Cam-jug past the pontooth (fang). Some fixed gear.
  • 1500 Bivouac Gledhill Bivvy (*Hanging)

Ozymandias Day 3

  • 0700 Jumar, haul P7
  • 0900 Lead, clean, haul P8 (haul to left); 3hr
    • Up/right to a ledge, up chimney, belay below summit-block. Easy Chimney, a bit run-out.
  • 1200 Lead, clean, haul P9; 3hr
    • Cam-jug #4 and #5. Small pro in crack to left.
  • 1500 *Top Out*. Walk back to stone shelter via tourist-track.

Ozymandias Day 4

  • Contingency

Ozymandias Packing List

The majority of items to be packed into haul-bag AKA the “pig”, with small items separated into top pocket. Food, cookware, toiletries and warm-clothes in separate packing cells. Bulk water packed into the base with shelter and warm-clothes at the top. Food, cooking and sleeping-bag under that.

Waste container clipped to pig during approach/withdraw and tagged from the bottom by a 3m cord during climb (trust me this cord cannot be made long enough!). Walking poles and #4 and #5 cams also tagged from the pig during climb.

Haul bag.  Aid Climbing Equipment
Notice the rope hanks are coupled together by a reef knot. This is to drape over the top of the pack while the hanks are tied back with a sling.

Water and Cooking

  • Water 12 litres (coke bottles)
  • Hanging Stove
  • Small Cook Set
  • Small Gas Canister
  • Coffee pour-over set (cone + filters)
  • Enamel cup
  • Bottle Sling (thin cord)

General Gear

  • Wag Bags x4 (including rationed toilet paper)
  • Waste container (for sh*t)
  • Hand-Sanitiser
  • AAA Batteries x9
  • Lighter (2 of 2)
  • Headlamp (2 of 2)
  • UHF Radio
  • Micro-towel
  • Paracetamol
  • Bandaids
  • Lip Balm (2 of 2)
  • Sunscreen (miniature)
  • Insect Repellent (miniature)
  • Sunglasses (with cord)
  • Garbage Bag (folded)
  • Pen and Small Pad
  • Hiking Poles x2
  • Go-Pro + Batteries
  • Climbing Shoes for P1?
  • Accessory ‘biners and small cord for clipping-off various items
  • Topo laminated in packing tape

Shelter and Sleeping

  • Tarp
  • Hammock
  • Bivvy Sack
  • Foam pad (simple)
  • Synthetic sleeping bag
  • Alloy tent pegs x2
  • Extra cord (para cord)

Food

  • Dehydrated Meals x4 (Dinner)
  • Cliff Bars x3 (+ 2 left in car)
  • Museli Bars x4
  • Up and Go Liquid Breakfast x3
  • Tea Bags (Chai) x4
  • Coffee (Ground) ziplock bag, several tablespoons
  • Dark Chocolate
  • Cheese roll with beetroot vegetarian burger patty in foil, compressed to tennis-ball size x4 (Lunch)
Haul bag.  More Aid Climbing Equipment
Close-up of the gears…

Clothes

Synthetics and Wool only for warmth in wet conditions.

  • Merino Wool Thermals (top+bottom)
  • Merino Wool T-shirt
  • Hooded Synthetic Fleece
  • Synthetic Puffer Vest
  • Synthetic Hiking Pants
  • Briefs x2
  • Wool socks x2
  • Thinsulate Beanie
  • Lightweight Rain Shell
  • Rain shell over-pants
  • Approach shoes (for approach and aid climbing)
  • Protective Gloves

Emergency / Items on person

Emergency and primary first aid items in case of injury or entrapment and separation from the haul-bag. Carried on-person when away from belay. Redundant sources of light, fire and some water is split between Camel Back and Haul-Bag.

  • Camel Back (Mountain biking style, carried on back when climbing and front during approach)
    • Emergency thermal blanket (folded)
    • Garbage Bags x2 (folded)
    • Compass
    • Sports tape
    • Super Glue
    • Whistle
    • Knife
    • Lighter (1 of 2)
    • Headlamp (1 of 2)
    • Digital Watch
    • Opiate tablets
    • Band-aids (a few)
    • Lip Balm (1 of 2)
    • Lunch, Snack, Water, Rain-shell as required
Haul bag.  Even more Aid Climbing Equipment
More gears…

Climbing Equipment / The “Rack”

  • 60m Dynamic climbing rope x2
  • Rope Bags x2 (re-usable green shopping bags – perfect fit!)
  • Harness
  • Cams #0.1 to #2 + #4 doubles
  • Cams #3, #5 single
  • Medium RPs (brass micronuts, Double #3)
  • Medium HBs (offset brass micronuts)
  • Peenuts (offset aluminium micronuts)
  • Nuts (doubles of small to medium, singles of large sizes)
  • Hexes
  • Black Diamond Talon Hook x1
  • Black Diamond Cliff Hanger Hook Large x1
  • Medium Moses Cam Hooks x2
  • Narrow Moses Cam Hooks x2
  • Hero Loops (several, tape with waterknot)
  • Bungee cord loops (for virtual “rebelays”)
  • Prusik cords x 3
  • Micro-Traxion haul device x1
  • Roll N Lock Haul device (for remote-end hauling) x1
  • Pulley x1
  • General Carabiners x30
  • Locking Biners x7
  • Slings x4
  • Bolt Hangers x 6
  • ATC Belay device
  • Gri-Gri (death-modified)
  • Aiders x2
  • Daisy-chains x2
  • Jumars x2
  • Nut tool x2 (1 on harness, one in pig)
  • Cordellete x1
  • Large Sling x1
Aid climbing hooks.
Freshly slung hooks.

Base-weight as carried on approach

Approximate base-weight as carried on approach, IE. including food but only 3l of water. This totaled 34.6kg; 40% of my body-weight at the time. Over half the weigh is represented by the ropes and rack.

Pack base weight for Ozymandias Direct Aid Solo.
Base weight on the approach approximately 34.6kg – 40% my body weight at the time.
Ozymandias approach via south side track - the direct climb visible in the background.
Loaded up on the approach. Ozymandias in the background (buttress to the left with the great yellow roof).

Check out Part 2 where I launch into the daily trip-report and don’t forget to subscribe below for more cursed ascents.

Powered by WordPress & Theme by Anders Norén

%d bloggers like this: